Azure AD SCIM Client
This is a basic example to get started configuring Azure AD/Microsoft Entra ID as a SCIM client and establish a connection between FusionAuth and Azure AD for provisioning purposes.
For complete documentation, please refer to the Azure AD/Microsoft Entra ID provisioning documentation.
Azure AD is Microsoft Entra ID. But the usage of Azure AD is common. In this document, wherever you see Azure AD, rest assured we mean Microsoft Entra ID as well.
To configure the integration, in the Microsoft Azure console, navigate to Azure AD and click on Enterprise Applications and either create a new application, or select the application you will be using for SCIM provisioning. Once you have selected the application, click on Provisioning in the left navigation under the Manage section.
Here you will find an Update Credentials option in the Manage Provisioning section at the bottom of the page. Expand the Admin Credentials section find the required configuration fields.
This screenshot is an example only. The preferred integration is to use client credentials so that you do not need to create a long lived token.
If at all possible you should be directly integrating the client credentials grant. Using a long lived token becomes an API key that you cannot revoke.
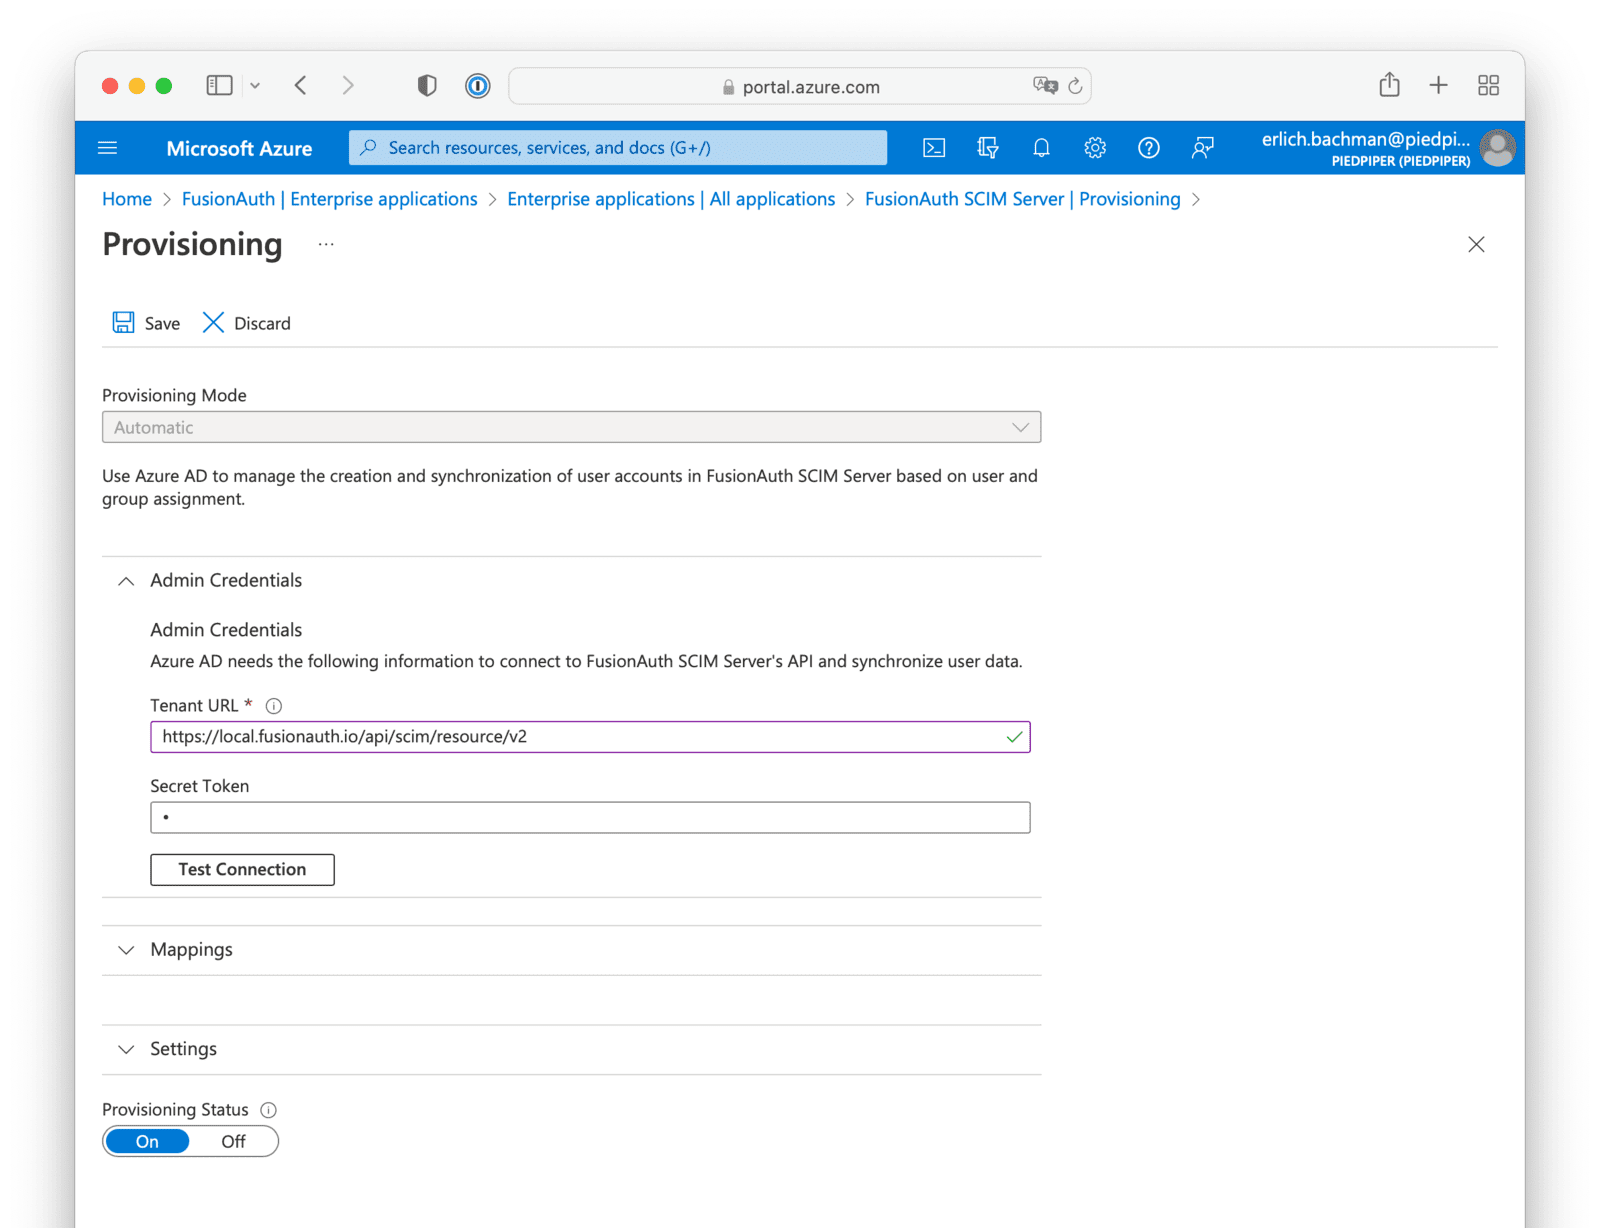
Tenant URLSet this value equal to the FusionAuth SCIM tenant URL found in the Tenant view dialog.
For example, if the base URL for FusionAuth is https://piedpiper.com, your SCIM URL will be https://piedpiper.com/api/scim/resource/v2
Secret TokenThis value will be set using the access token generated using the client credentials grant for the SCIM client entity and the SCIM server entity. Learn more about getting the access token.