SAML v2 & Tableau Cloud
Tableau is one of the most advanced data visualization tools used for business intelligence and data analysis. This document covers the configuration necessary to get Tableau Cloud working with FusionAuth as the identity provider using SAML v2, allowing users to log in to your Tableau Cloud account using their FusionAuth credentials.
Prerequisites#
This document assumes you have a running instance of FusionAuth and a working Tableau Cloud application. You will also need admin accounts for both to configure them correctly.
Finally, you'll need a FusionAuth user that you will use to sign into Tableau. You can use an existing user or create a new user for this purpose.
Enabling SAML for Tableau#
In your Tableau Cloud dashboard, navigate to Settings -> Authentication . Select Enable an additional authentication method, choose SAML and click Edit connection to open the settings.
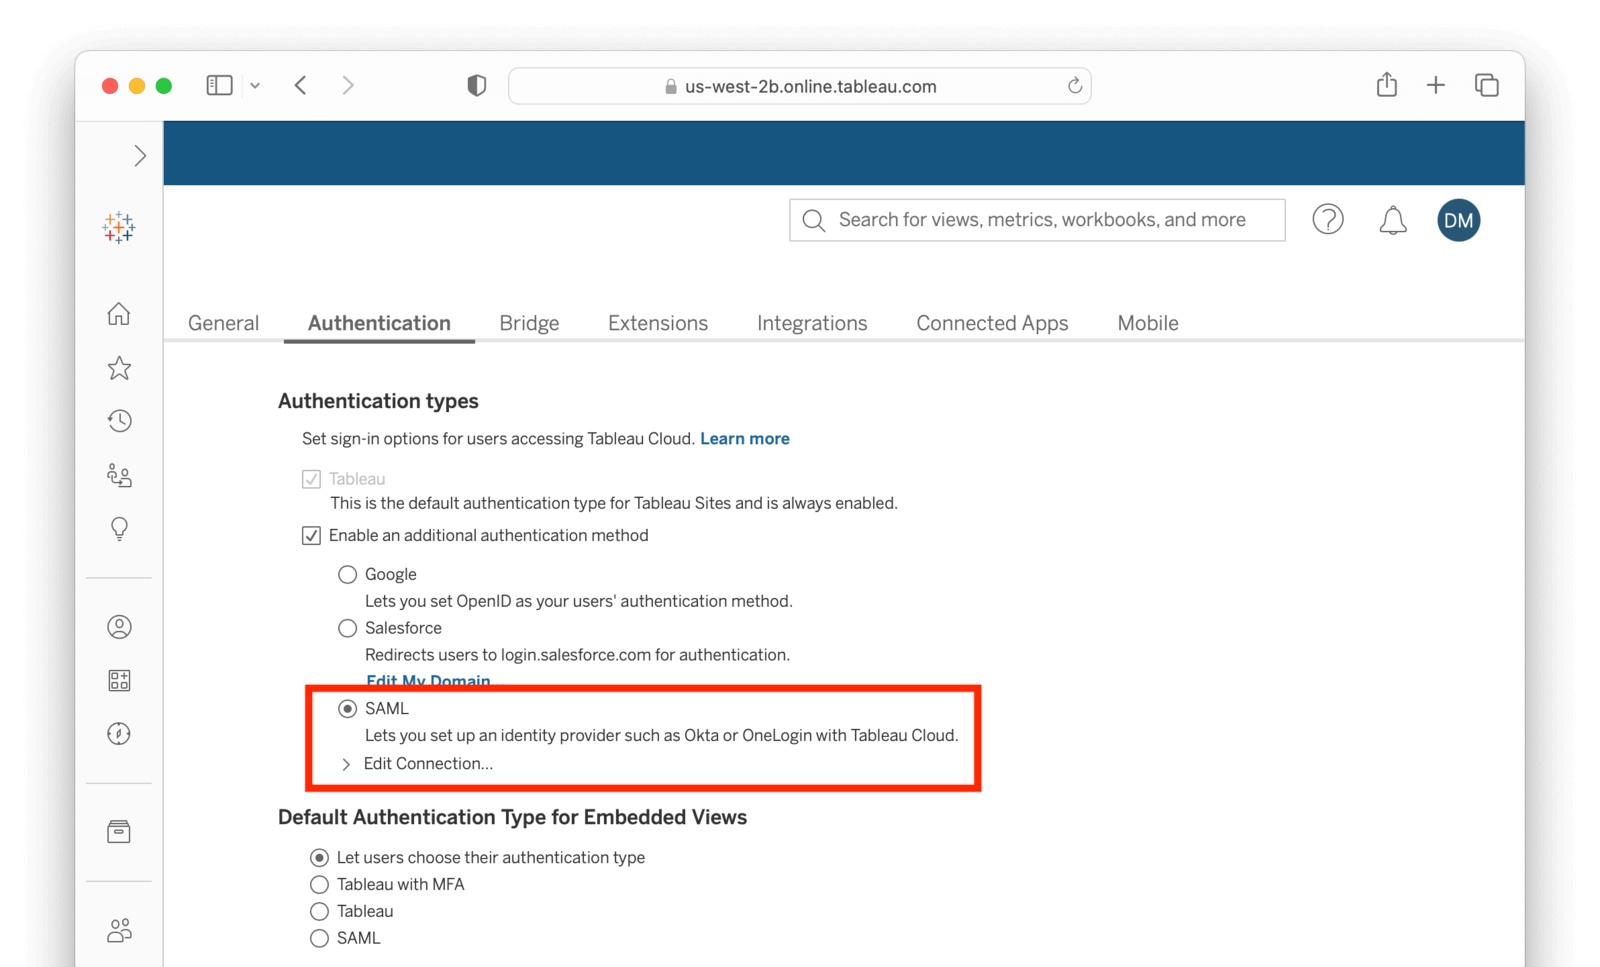
Copy both Tableau Cloud entity ID and Assertion Consumer Service URL (ACS) from Export metadata from Tableau Cloud and write them down. You'll use them shortly.
Now, log in to your FusionAuth instance to create a new application. Navigate to Applications and click the button and give it a meaningful name (e.g. Tableau).
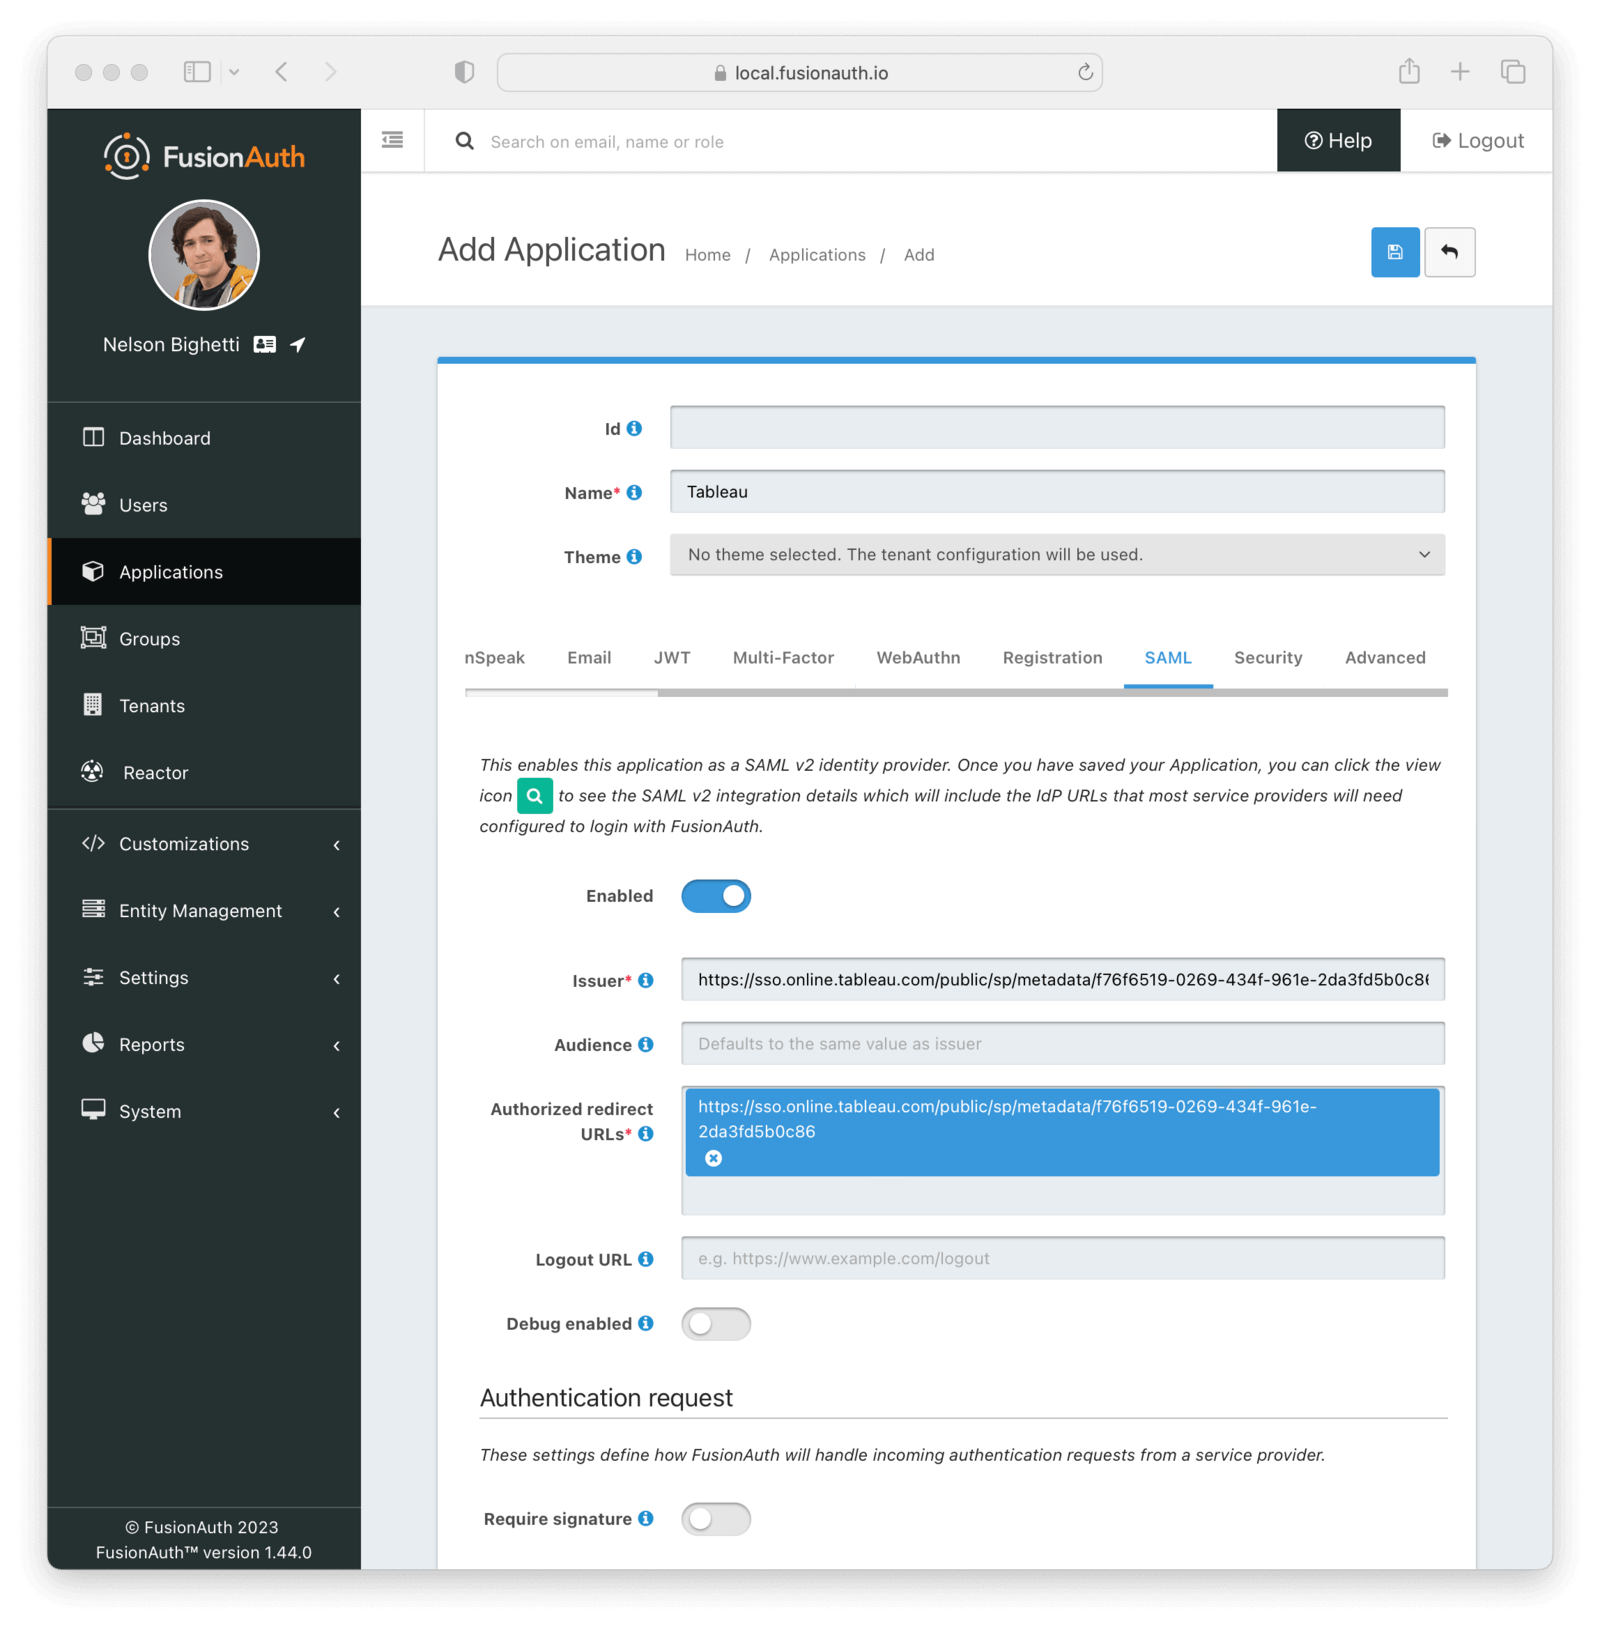
Go to the SAML tab and toggle the Enabled switch. Paste the Tableau Cloud entity ID and Assertion Consumer Service URL (ACS) you copied from Tableau to Issuer and Authorized redirect URLs fields in your FusionAuth application, respectively.
Mapping fields
| Tableau | FusionAuth |
|---|---|
| Tableau Cloud entity ID | Issuer |
| Assertion Consumer Service URL (ACS) | Authorized redirect URLs |
Click to save your application.
In the Applications page, click on the button next to your application to view its details. In the modal that opens, scroll down a bit until you reach the SAML v2 Integration details section.
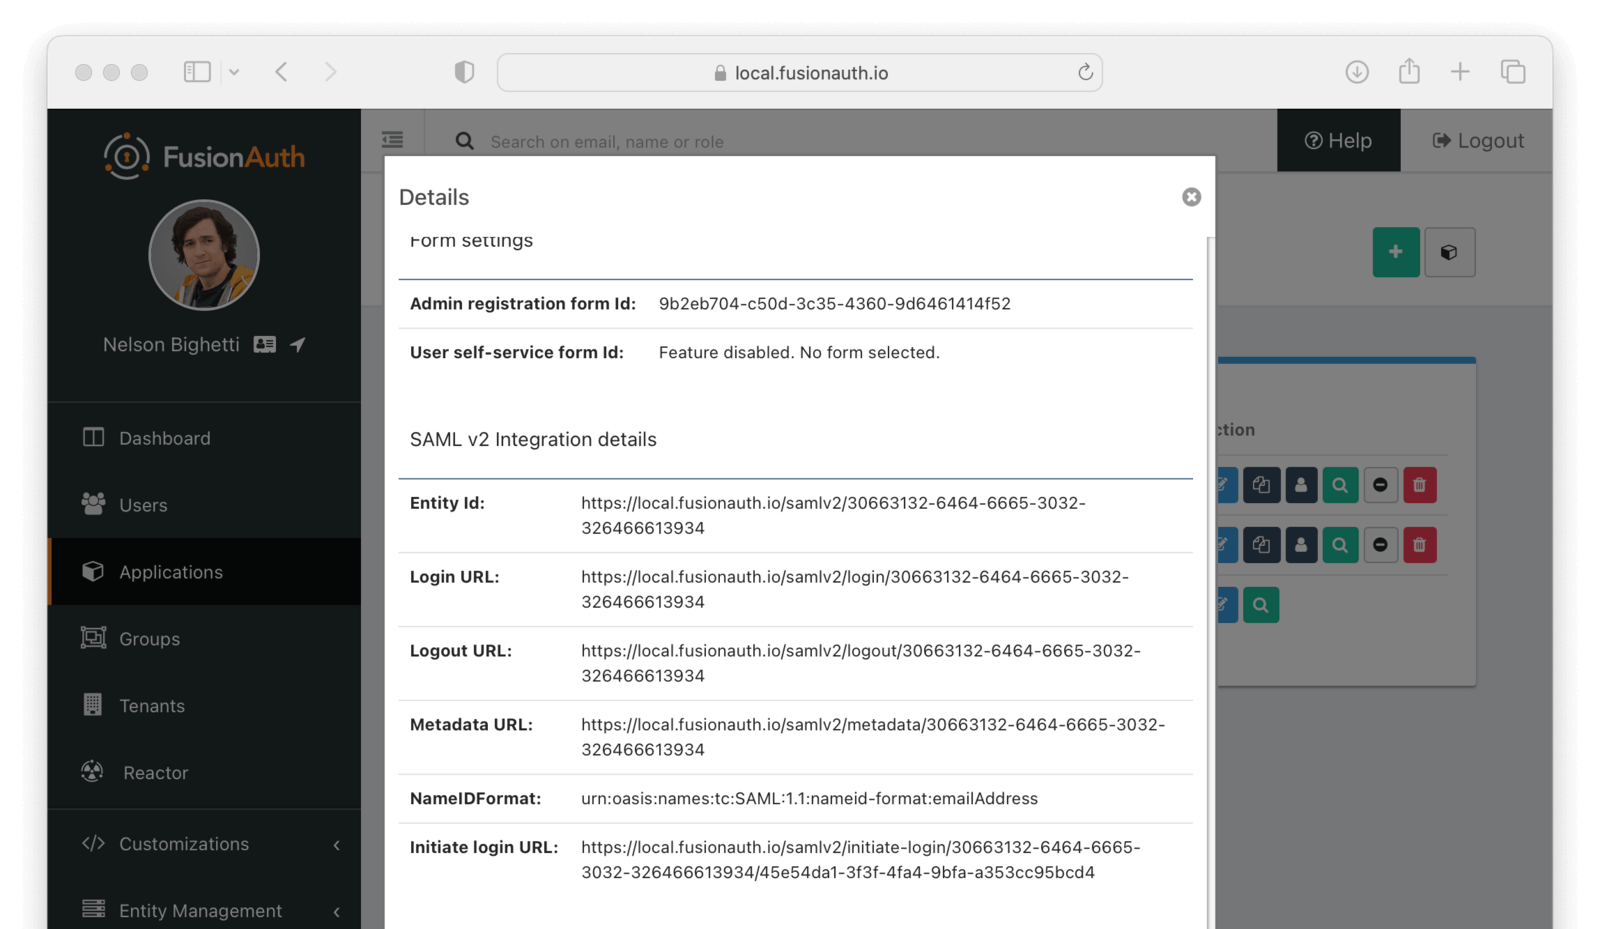
Copy the address from Metadata URL: and open it in a new tab in your browser. If the file didn't automatically download, save it.
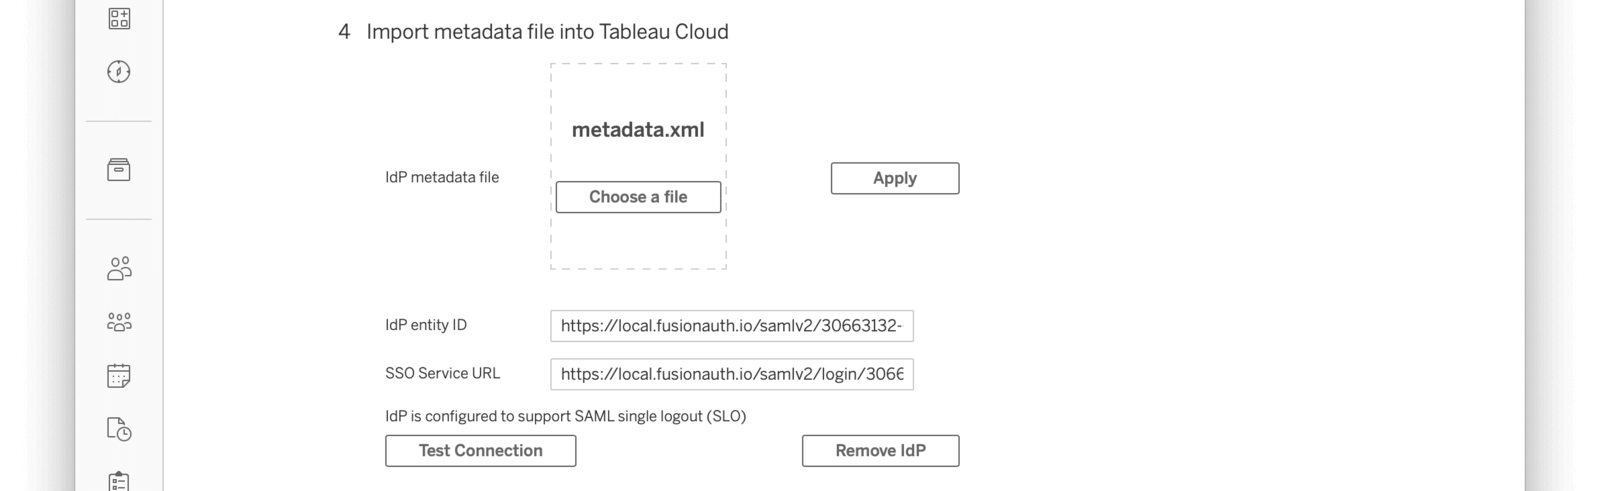
Go back to your Tableau account and upload this in the Import metadata file into Tableau Cloud field by either dropping the file there or clicking Choose a file and selecting it. Click Apply to load the information from the metadata file into both IdP entity ID and SSO Service URL fields. You should see something like the image below.
Click Test Connection to open a modal with the FusionAuth login screen. Fill in your credentials and submit the form. You should see a Successfully connected to server message below that button.
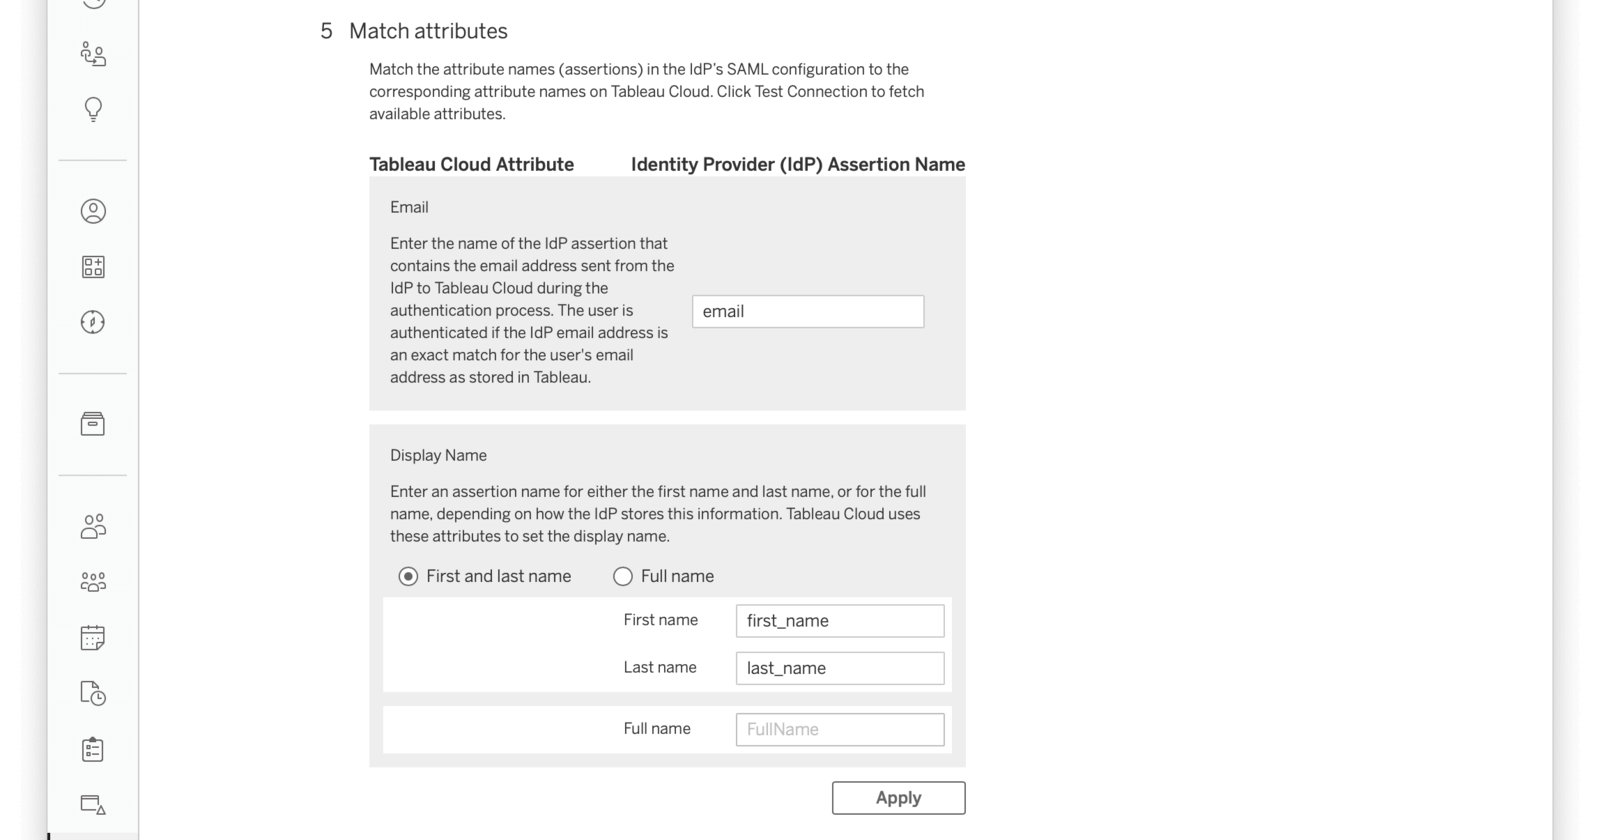
In Match attributes, map email, first and last name fields like shown in the image below and click Apply.
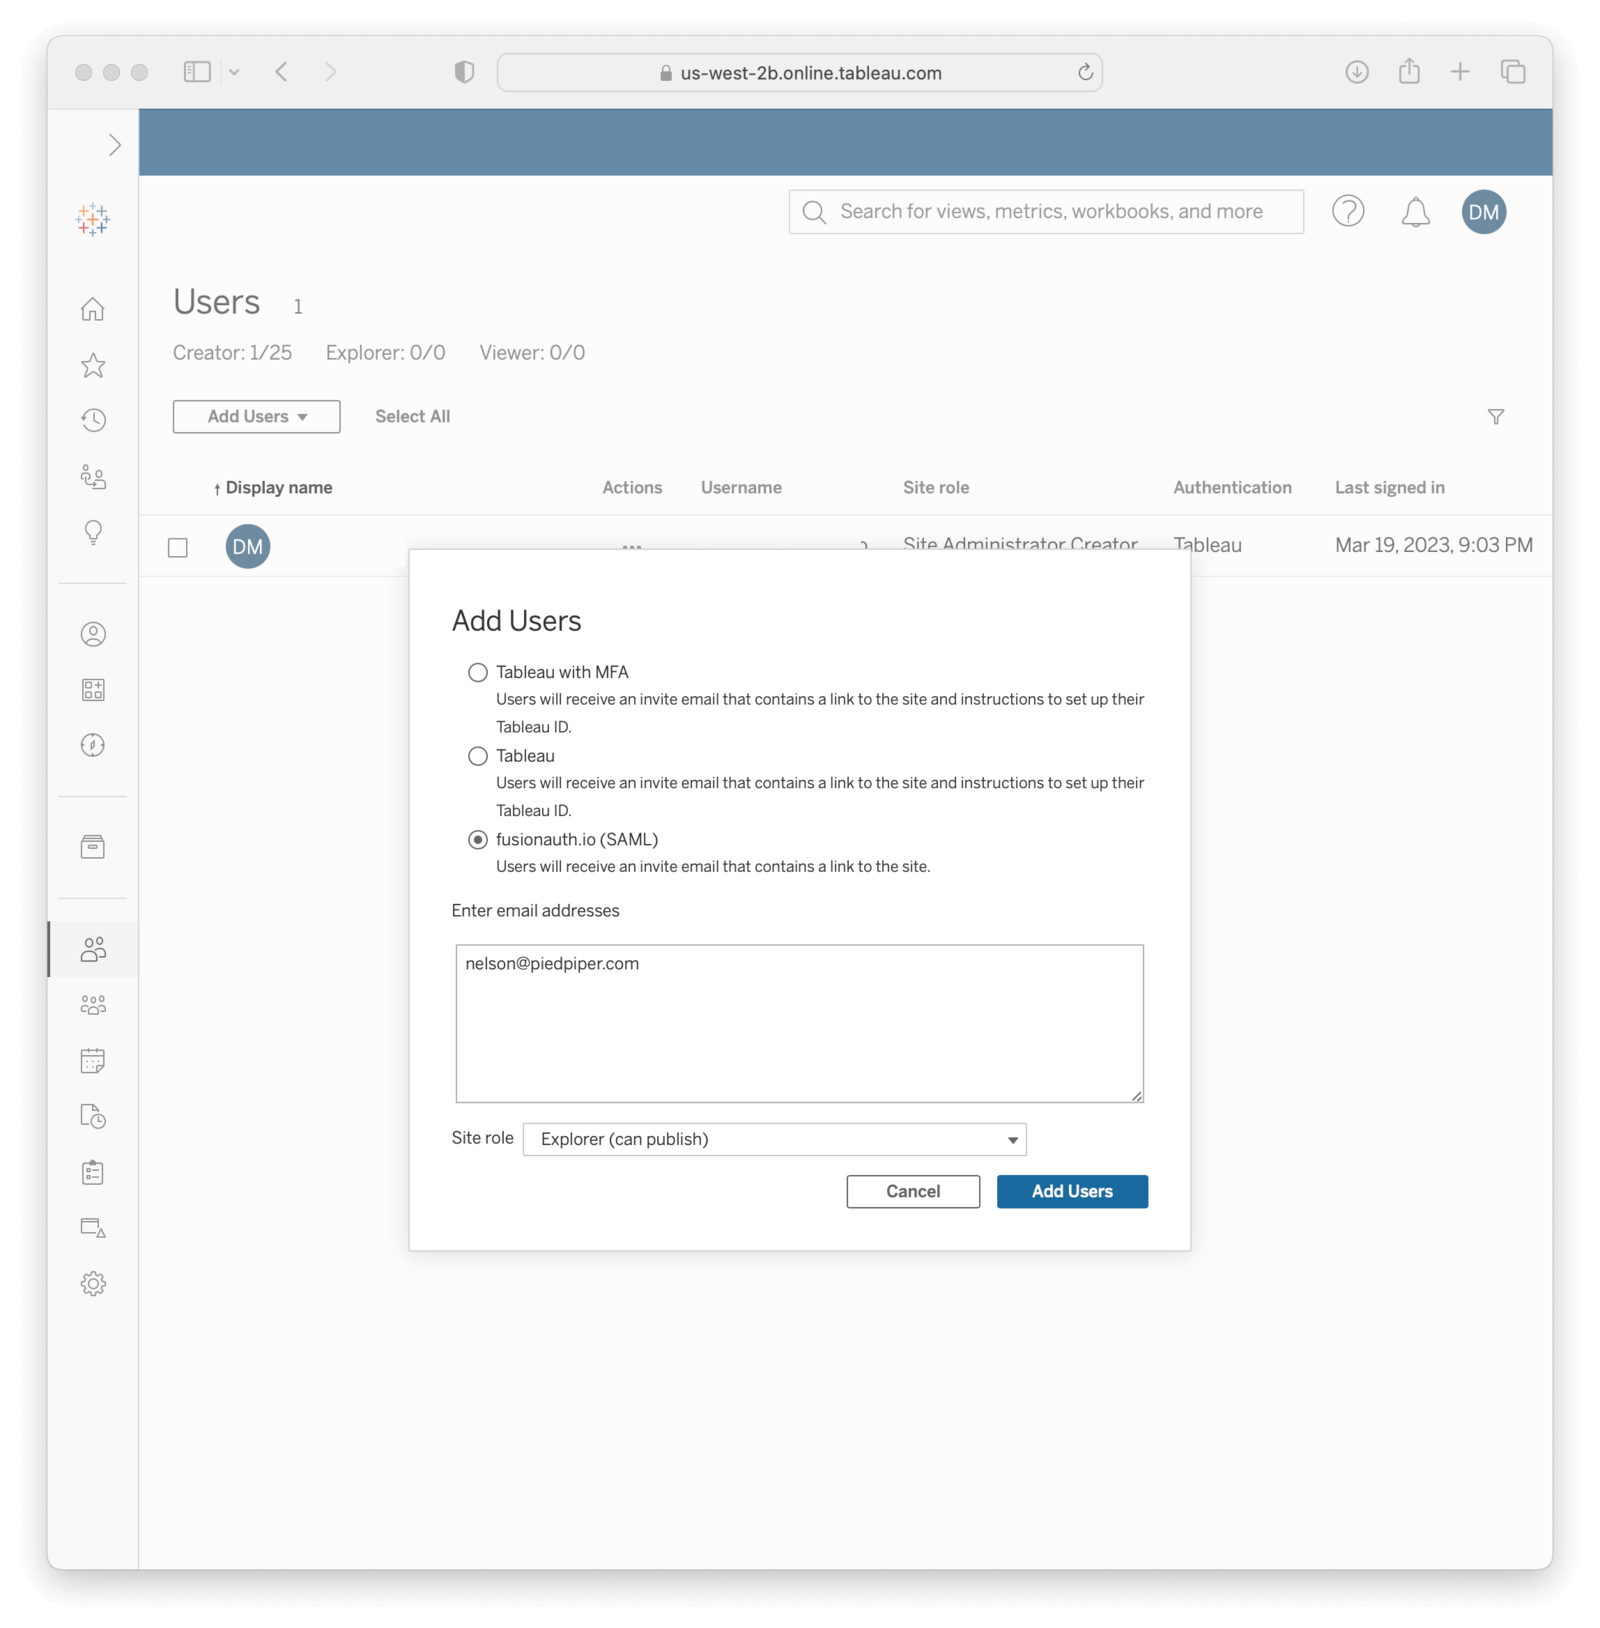
Add a New User#
In your Tableau Cloud account, go to Settings -> Authentication (the same page you've configured the authentication above) and scroll down to Manage Users. Click Manage Users and then Add Users by Email to send invites to the desired users. Tableau supports SCIM for automated provisioning, as does FusionAuth, but that is beyond the scope of this document. You must provide the same addresses they use to log in to your FusionAuth instance.
After doing so, they should receive an email with a link to the login page. When browsing to that page, they should enter their email address.
They'll be redirected to the FusionAuth login screen when they click Sign in. There, they should fill in the credentials for their FusionAuth account. After they authenticate successfully, they will be sent to the Tableau Cloud dashboard.
Troubleshooting#
Make sure you paste the right information from Tableau Cloud entity ID and Assertion Consumer Service URL (ACS) fields into your FusionAuth application.
You can also browse to Settings -> Authentication in your Tableau Cloud dashboard and click Download log file in Troubleshooting single sign-on (SSO) to further investigate.
Finally, you can edit your FusionAuth application, go to the SAML tab and click Debug enabled to create an event log with more information. To see these logs, browse to System -> Event Log .
You can also review the Tableau Cloud SSO docs.