Identity Pre-Verification Via API
This guide shows how to verify a user's email or phone identity using FusionAuth APIs only, without hosted pages and Advanced Registration Forms. You will:
- Start an identity verification flow
- Optionally send a code to the user
- Complete verification with the code (or via clickable link)
- Create the user using the returned verificationId
If you're looking for the hosted pages version with Advanced Registration Forms, see:
Prerequisites#
Before you begin, ensure your environment meets these requirements. This guide assumes you are running FusionAuth version 1.62.0 or greater. If you aren't, head on over to the installation guide or the upgrade guide to update to a version with support for this feature.
Email/Phone Verification and identity pre-verification are not premium features; however, enforcing pre-verification with Advanced Registration Forms as well as Gating is. If you are following this guide implementing pre-verification entirely via API, you can still build equivalent gating in your application logic. See the hosted pages guides if you prefer FusionAuth to enforce gating for you.
General Flow#
Identity pre-verification follows these steps:
-
Start Verification Flow
- POST /api/identity/verify/start
- Provide the identity value in loginId and the type in loginIdType (
emailorphoneNumber). - For pre-verifying identities before user creation, set existingUserStrategy to
mustNotExist. - The response includes a verificationId and may include a oneTimeCode if using the
FormFieldstrategy.
-
Send Code (optional)
- POST /api/identity/verify/send
- Provide the verificationId. Use this if you want FusionAuth to send the email or SMS containing the code or clickable link.
-
Complete Verification
- POST /api/identity/verify/complete
- Provide the verificationId and, if using the
FormFieldstrategy, the oneTimeCode. - If the strategy is
ClickableLink, you can validate using just the verificationId (the user clicks the link).
-
Create the User
- POST /api/user or /api/user/registration
- Include the verificationIds array from step 1 associated with the verified identity.
existingUserStrategy values are lowercase: mustExist and mustNotExist.
The default verificationStrategy depends on your tenant configuration:
- email:
tenant.emailConfiguration.verificationStrategy - phone:
tenant.phoneConfiguration.verificationStrategy
Both are set to either ClickableLink or FormField.
For full details, see the Identity Verify API.
Executing Flow Using Postman#
Use these Postman examples to try each step of the API-only flow in a local or test environment.
These examples assume a local FusionAuth instance at http://localhost:9011 and that you're sending an API key in the headers as required by your configuration. Adjust host, tenant header, and authorization to match your environment.
1. Start Verification Flow#
Start by creating a verification to obtain a verificationId and, if processed in one step, a oneTimeCode.
- URL: http://localhost:9011/api/identity/verify/start
- Method: POST
- Body:
{
  "existingUserStrategy": "mustNotExist",
  "loginId": "testuser20@example.com",
  "loginIdType": "email"
}
Example result:
{
  "oneTimeCode": "ZLB632",
  "verificationId": "eIXDJDjMYOrcAEPDHdlnzVGIXE1kzjogdiJDBZLLxJg"
}
existingUserStrategy can be mustNotExist or mustExist.
The default verificationStrategy comes from the tenant settings and may be FormField or ClickableLink.
For complete parameter and response details, refer to Start Identity Verification.
2. Send Code (optional)#
Optionally have FusionAuth deliver the verification code or clickable link to the user. If you already received a oneTimeCode from Start and have another method to deliver it to the user, you may skip sending.
- URL: http://localhost:9011/api/identity/verify/send
- Method: POST
- Body:
{
  "verificationId": "eIXDJDjMYOrcAEPDHdlnzVGIXE1kzjogdiJDBZLLxJg"
}
Example result: HTTP 200 with an empty body.
If you want FusionAuth to send the email or SMS message, call this endpoint to deliver the code or clickable link. Before calling this endpoint, configure the prerequisite email server and messenger settings:
For complete parameter and response details, refer to Send Identity Verification
3. Complete Verification#
Confirm the user's control of the email address or phone number using the verificationId and, if required, the oneTimeCode.
- URL: http://localhost:9011/api/identity/verify/complete
- Method: POST
- Body (FormField strategy):
{
  "verificationId": "eIXDJDjMYOrcAEPDHdlnzVGIXE1kzjogdiJDBZLLxJg",
  "oneTimeCode": "ZLB632"
}
Example result:
{}
If the verificationStrategy is ClickableLink, completing can be done when the user clicks the link sent to them. In that case, completing with just the verificationId will validate the user.
For complete parameter and response details, refer to Complete Identity Verification
4. Create the User#
Create the user and associate the verified identity using the verificationIds from the previous steps.
- URL: http://localhost:9011/api/user
- Method: POST
- Body:
{
  "verificationIds": [
    "eIXDJDjMYOrcAEPDHdlnzVGIXE1kzjogdiJDBZLLxJg"
  ]
}
Example result: user object where the corresponding identity is marked verified: true.
For complete parameter and response details, refer to Create a User
Alternatively, you can create the user and registration in a single API call: Create a User and Registration Combined
Test It Out#
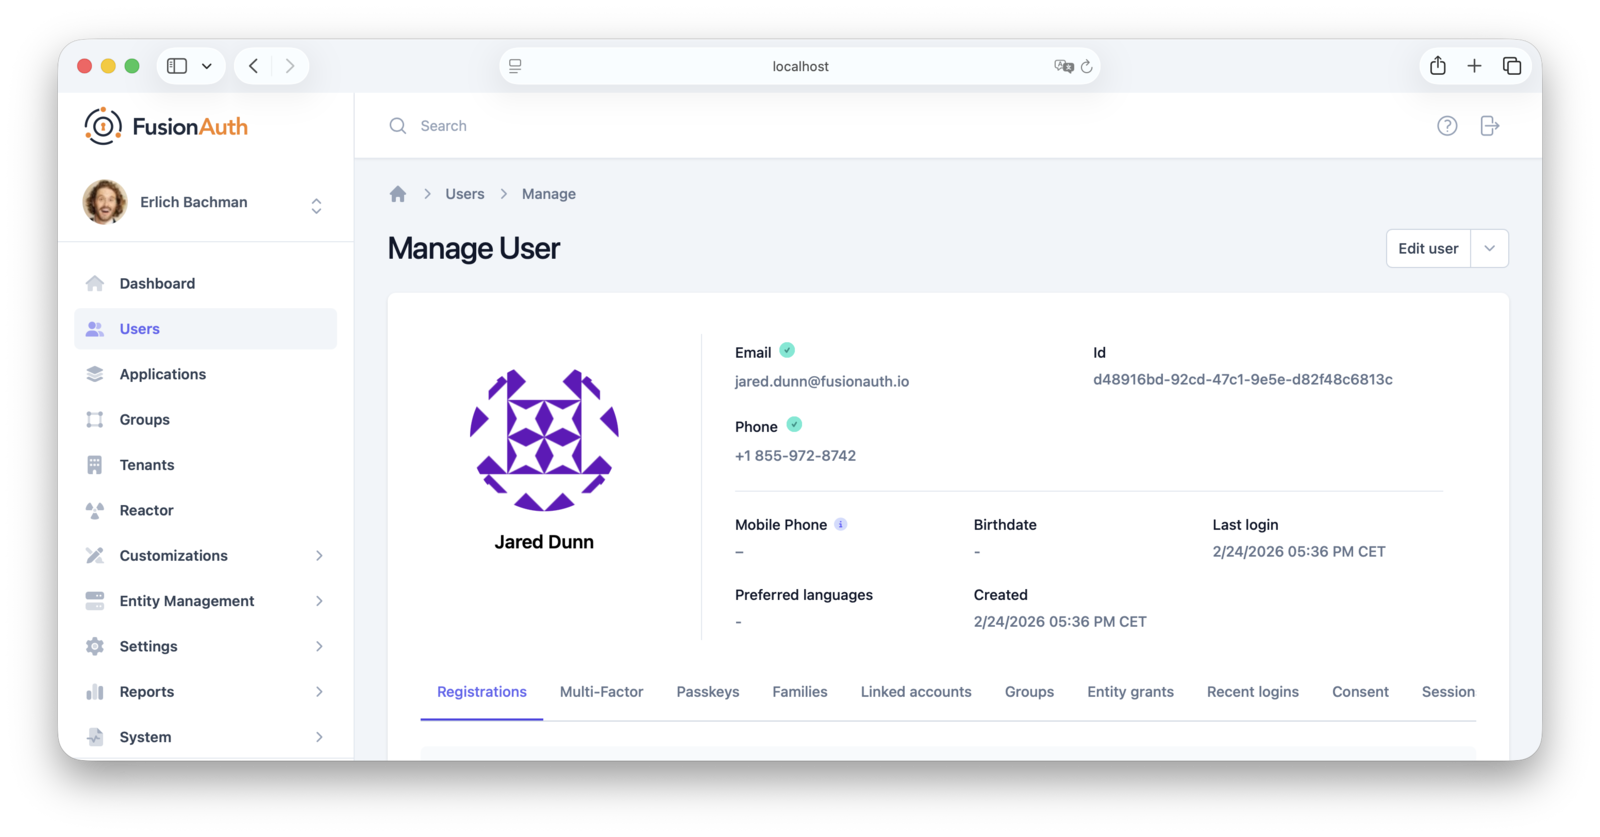
Validate the outcome in the FusionAuth admin UI.
You can validate the email or phone verification status by viewing the user in the admin UI by navigating to Users -> [select user] -> Manage . A verified email address or phone number displays a green checkmark icon next to the address.
Tips and Caveats#
Keep the following practical tips and edge cases in mind as you implement this flow.
- Use
mustNotExistwhen verifying identities before creating users; usemustExistto verify an identity for an existing user. - If you choose
FormField, plan for collecting and submitting the code from the user. If you chooseClickableLink, ensure the link is routable for the user and that your tenant/application templates are configured. - For email, ensure your tenant SMTP settings are configured. For phone, ensure a messenger (for example, Twilio) is configured if you plan to call the Send API.
- If you are running multiple tenants, include the
X-FusionAuth-TenantIdheader or provideapplicationIdas appropriate. See the API docs for scoping details.
For complete parameter and response details, refer to the Identity Verify API docs:
Next Steps#
Now that you've successfully set up identity pre-verification, refine your verification experience with the following customization: