Create a Deployment
On this page
A deployment is a FusionAuth instance that is operated by FusionAuth. You can create as many deployments as you like. To create a deployment, complete the following steps:
-
Log into your account at account.fusionauth.io.
-
Before configuring your deployment, add a payment method on the Billing page.
-
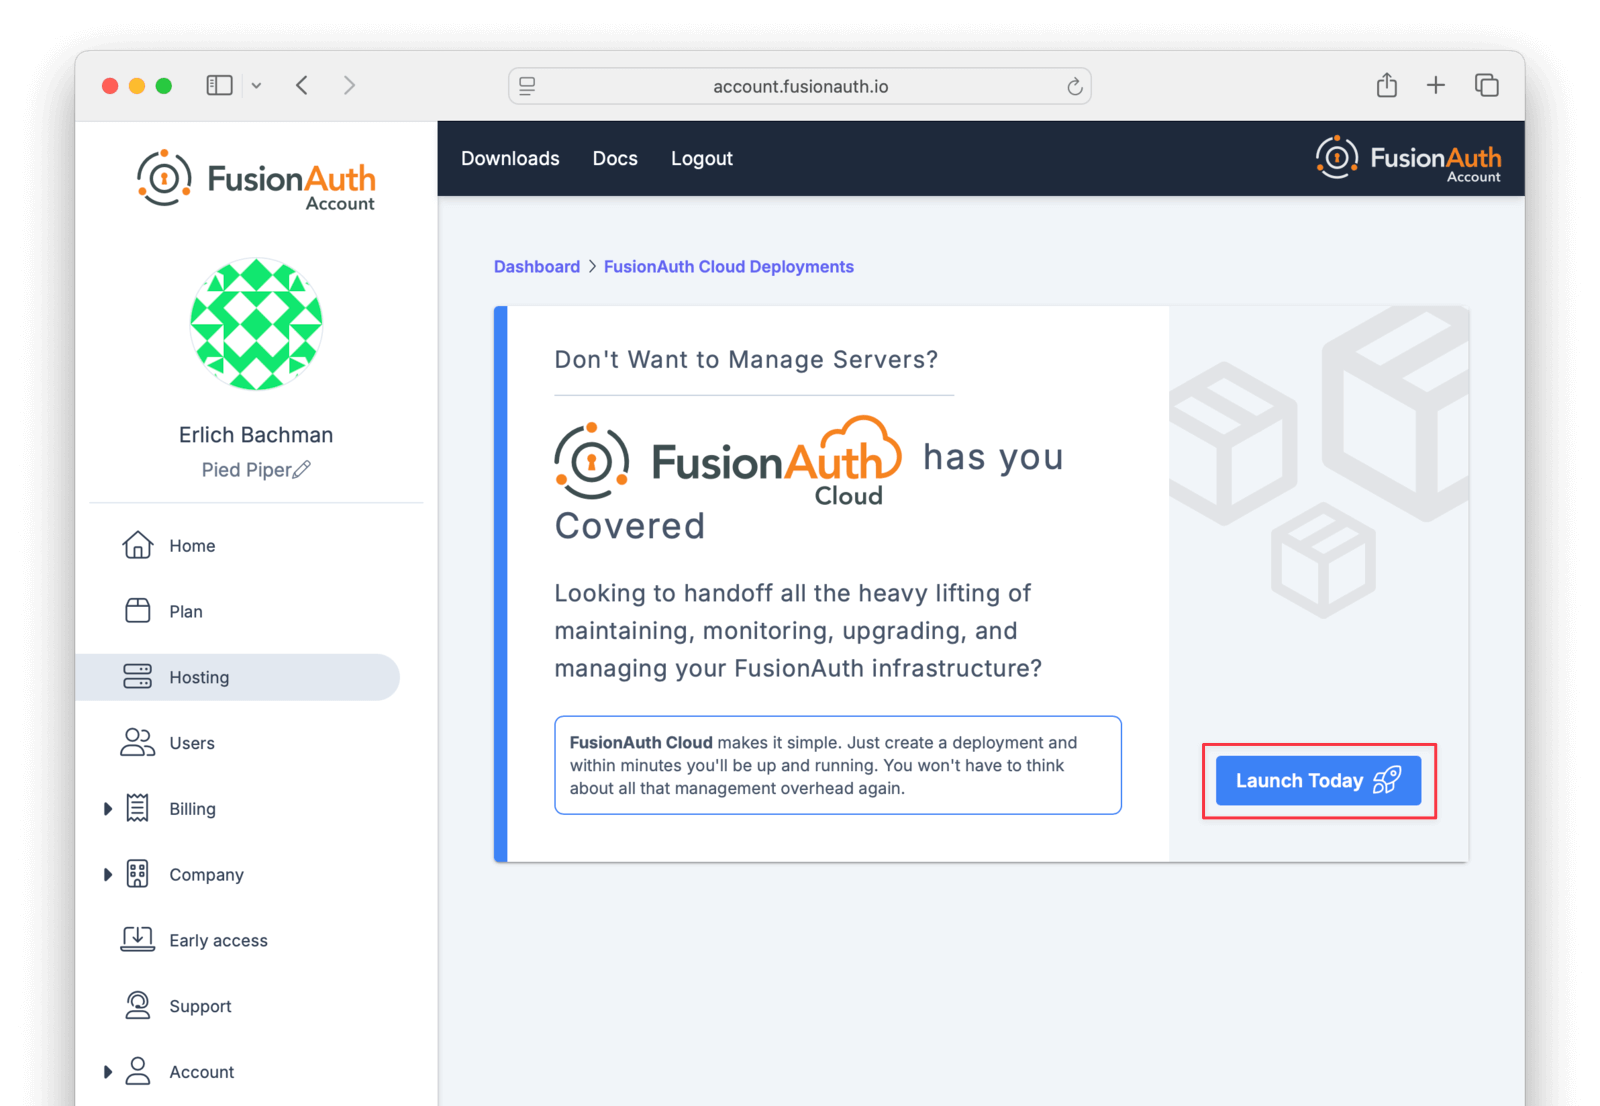
Navigate to the Hosting page. If you have no deployments, you will see a screen like this:
-
Click the Launch Today button to start a FusionAuth Cloud deployment.
-
Wait for the provisioning process to complete (5 to 30 minutes).
-
Navigate to the Setup status section on the deployment management screen and click the link below the URL label to visit the FusionAuth Admin UI for your deployment.
-
Complete the first time setup steps to initialize your deployment.
If you are on invoice billing, you cannot launch a FusionAuth Cloud deployment. Instead, you'll see the following error message:
This account is not able to make account changes. To make changes to this account, contact your account manager or sales@fusionauth.io.
Please file a support ticket to modify your billing status or request a new deployment.
Configure a Deployment#
You'll see a price at the bottom of the screen. This price will update as you change attributes of your deployment.
In order to create the correct FusionAuth instance, specify the following attributes:
-
hosting option:
Feature Basic Business High Availability (HA) Intended use development and testing non-critical prod mission-critical prod Database co-located separate server separate primary/secondary servers with full replication Backups none 3 days (30 after upgrade) 3 days (30 after upgrade) Custom domains 1 5 20 (unlimited, with an Enterprise plan) Upgrade downtime 5–60 minutes 5–60 minutes seconds SLA none none yes -
a unique hostname for the deployment (e.g.
piedpiper-dev); this hostname will be suffixed with thefusionauth.iodomain name. -
on certain plans, an alternate hostname (e.g.
auth.piedpiper.com)TipTo reuse an existing hostname or migrate data from an existing deployment, open a support ticket.
-
FusionAuth version (we recommend always using the latest version of FusionAuth)
-
hosting region; see Supported Geographies for the full list of countries in which FusionAuth has data centers. Pick the location that meets your legal and compliance needs and is close to your applications.
When you have your deployment configured as you would like, scroll to the bottom and click Purchase to begin the deployment creation process and charge your payment method.
Provisioning#
Navigate to the Hosting page to see the new deployment.
The exact duration of the deployment process depends on system load as well as the tier chosen. Expect your deployment to be available in 5 to 30 minutes.
Access the Admin UI#
To access the Admin UI for your FusionAuth instance, navigate to the Hosting page of the deployment management screen. Click the link below the URL label to visit the FusionAuth Admin UI for your deployment.
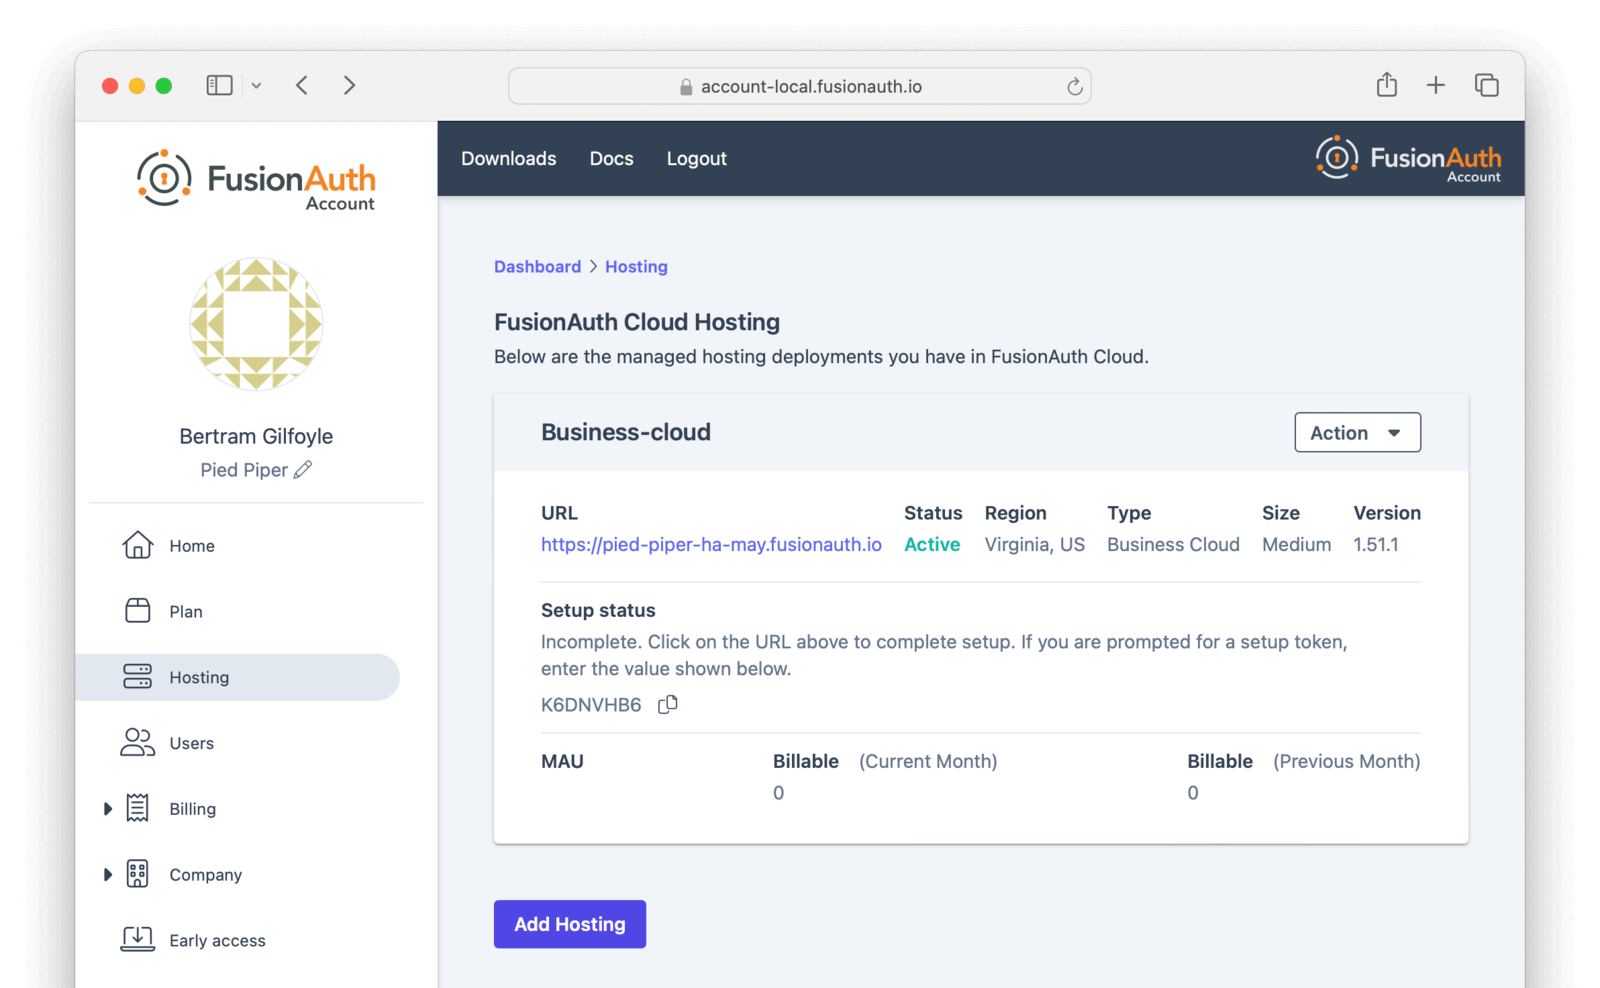
To protect new deployments, the first access to the Admin UI requires a setup token. If you navigate directly to the deployment URL, you will be prompted to enter an 8-character setup token. To find this token, navigate to the Hosting -> [your deployment] -> Setup status . Alternatively, click the link below the URL label to automatically submit the setup token when you open the page.
Once you have access to the Admin UI, complete the first time setup steps to initialize your deployment. You can configure your deployment by creating API keys, updating email host settings, configuring groups and roles, adding additional users, setting up applications for your users to log in to.
If you are new to FusionAuth, consider completing the Product Tour or one of our QuickStarts.
Related
Learn how to create a FusionAuth Cloud account.
Learn about the pros and cons of FusionAuth Cloud compared to self-hosted FusionAuth.
Learn how to run FusionAuth in various cloud environments.
Learn how to delete your FusionAuth Cloud account.