Custom Domains
On this page
FusionAuth Cloud supports custom domains across all plans. Deployments on Enterprise High Availability plans can enable the Unlimited Custom Domains experience, which includes advanced management capabilities and a modern user interface. In addition to allowing unlimited custom domains, the feature provides the following benefits:
- The ability to add and remove individual custom domains
- Custom domain validation and routing with a single DNS change
- DNS validation status checks for custom domains
- Faster provisioning of certificates
To enable the custom domains feature on one of your High Availability cloud deployments, open a support ticket.
Two Interfaces#
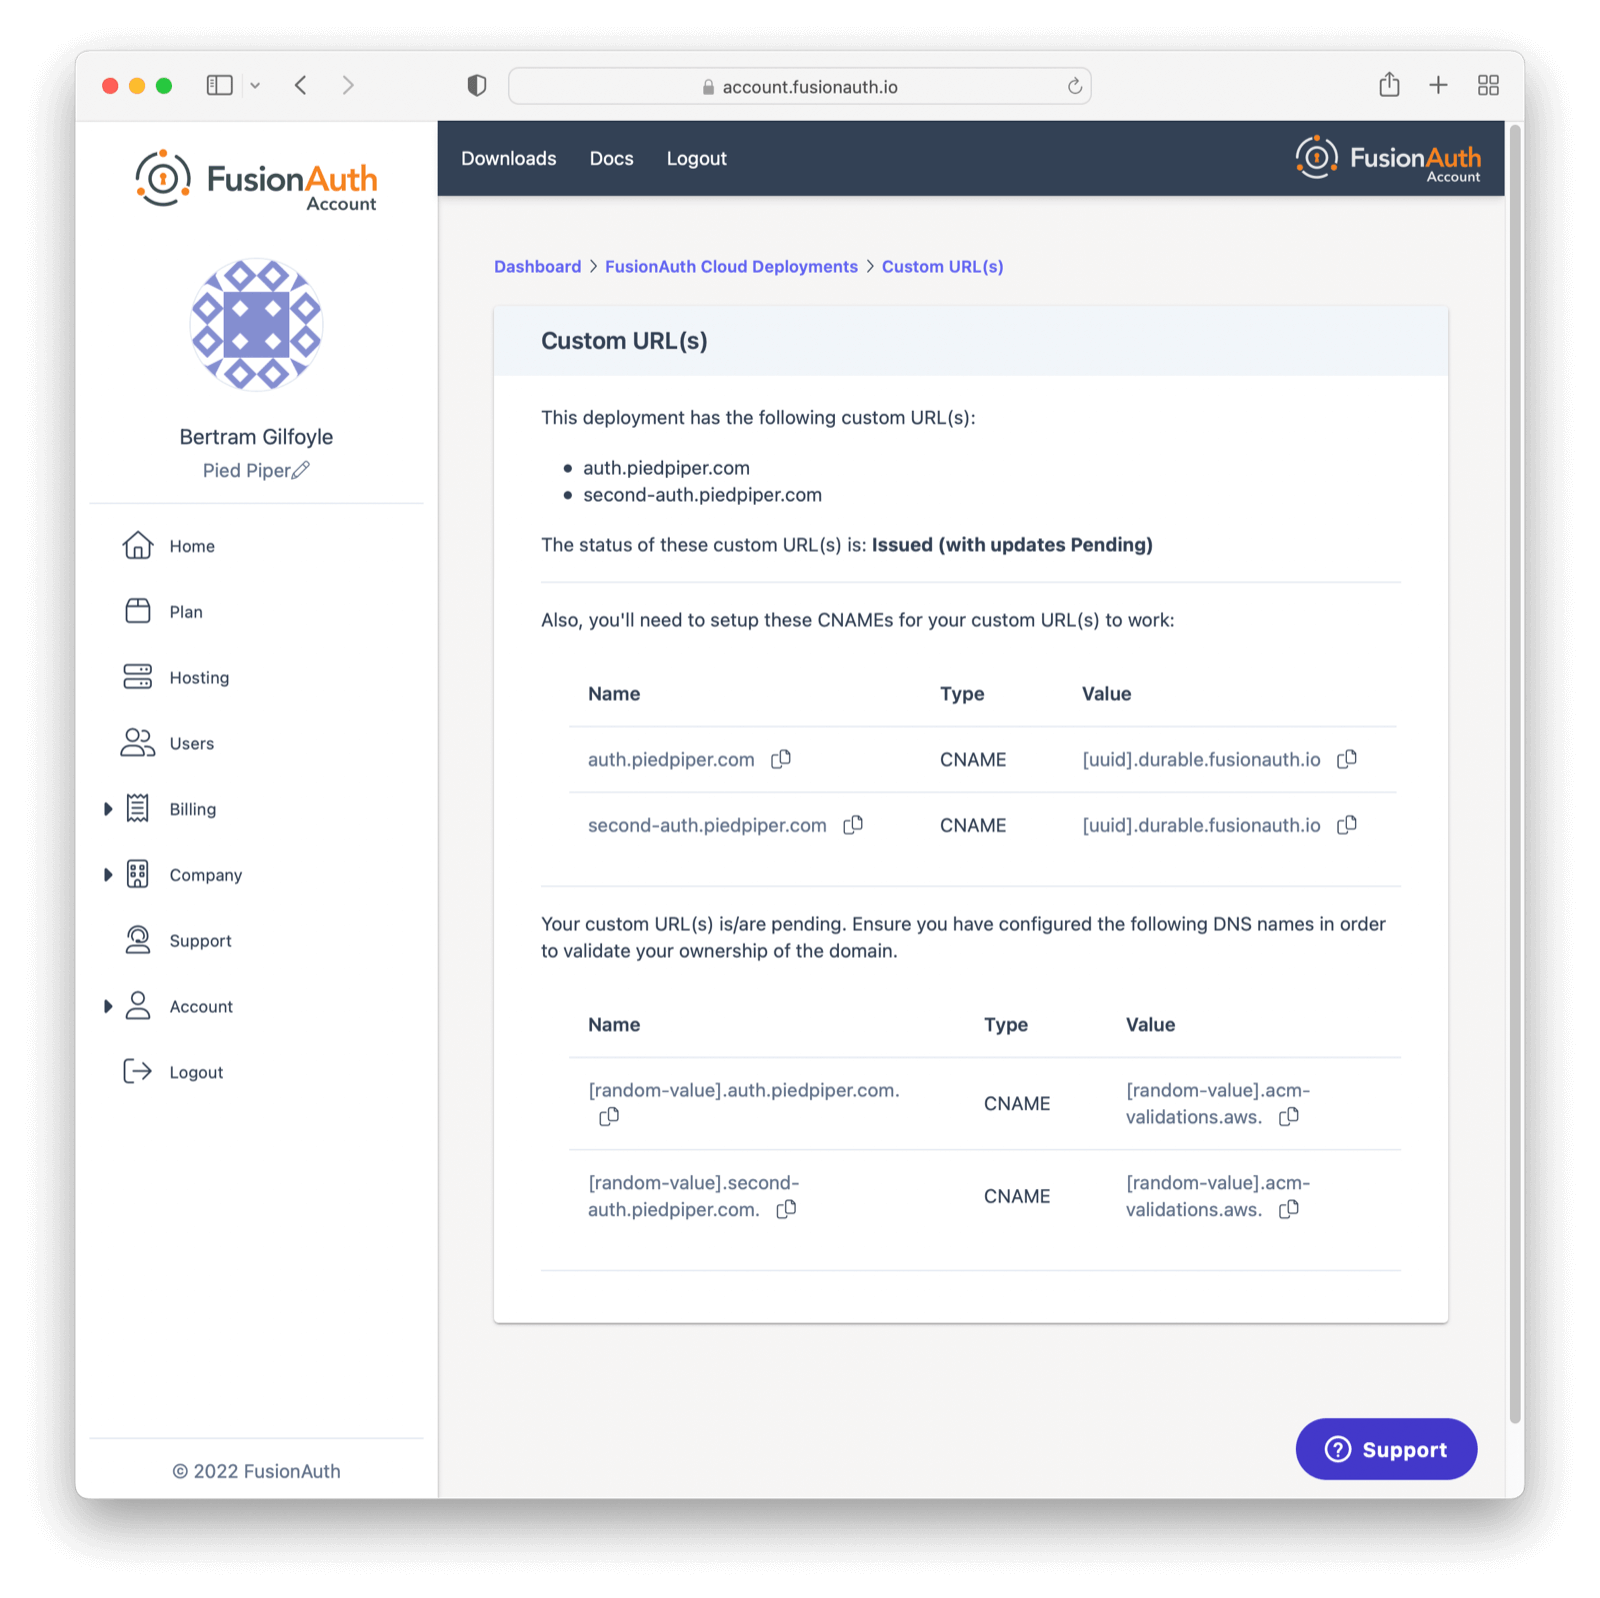
Customers may use one of two custom domain interfaces. To identify your interface, navigate to the Hosting page, then select Action -> Custom URL(s) for your deployment:
The Custom Domains page contains a list of domains as in-browser list items, providing the ability to independently add, edit, and delete each domain:
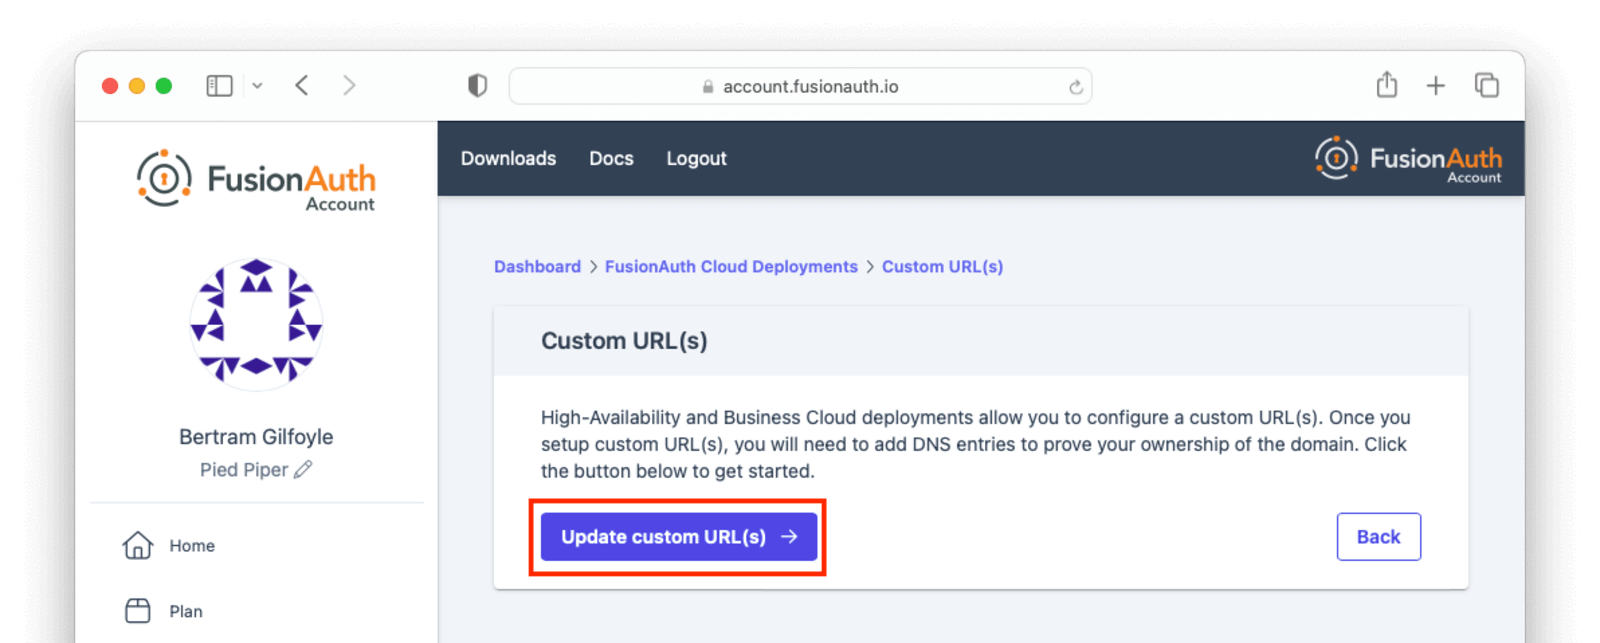
The Custom URL(s) page contains the Update custom URL(s) button, which opens the edit page:
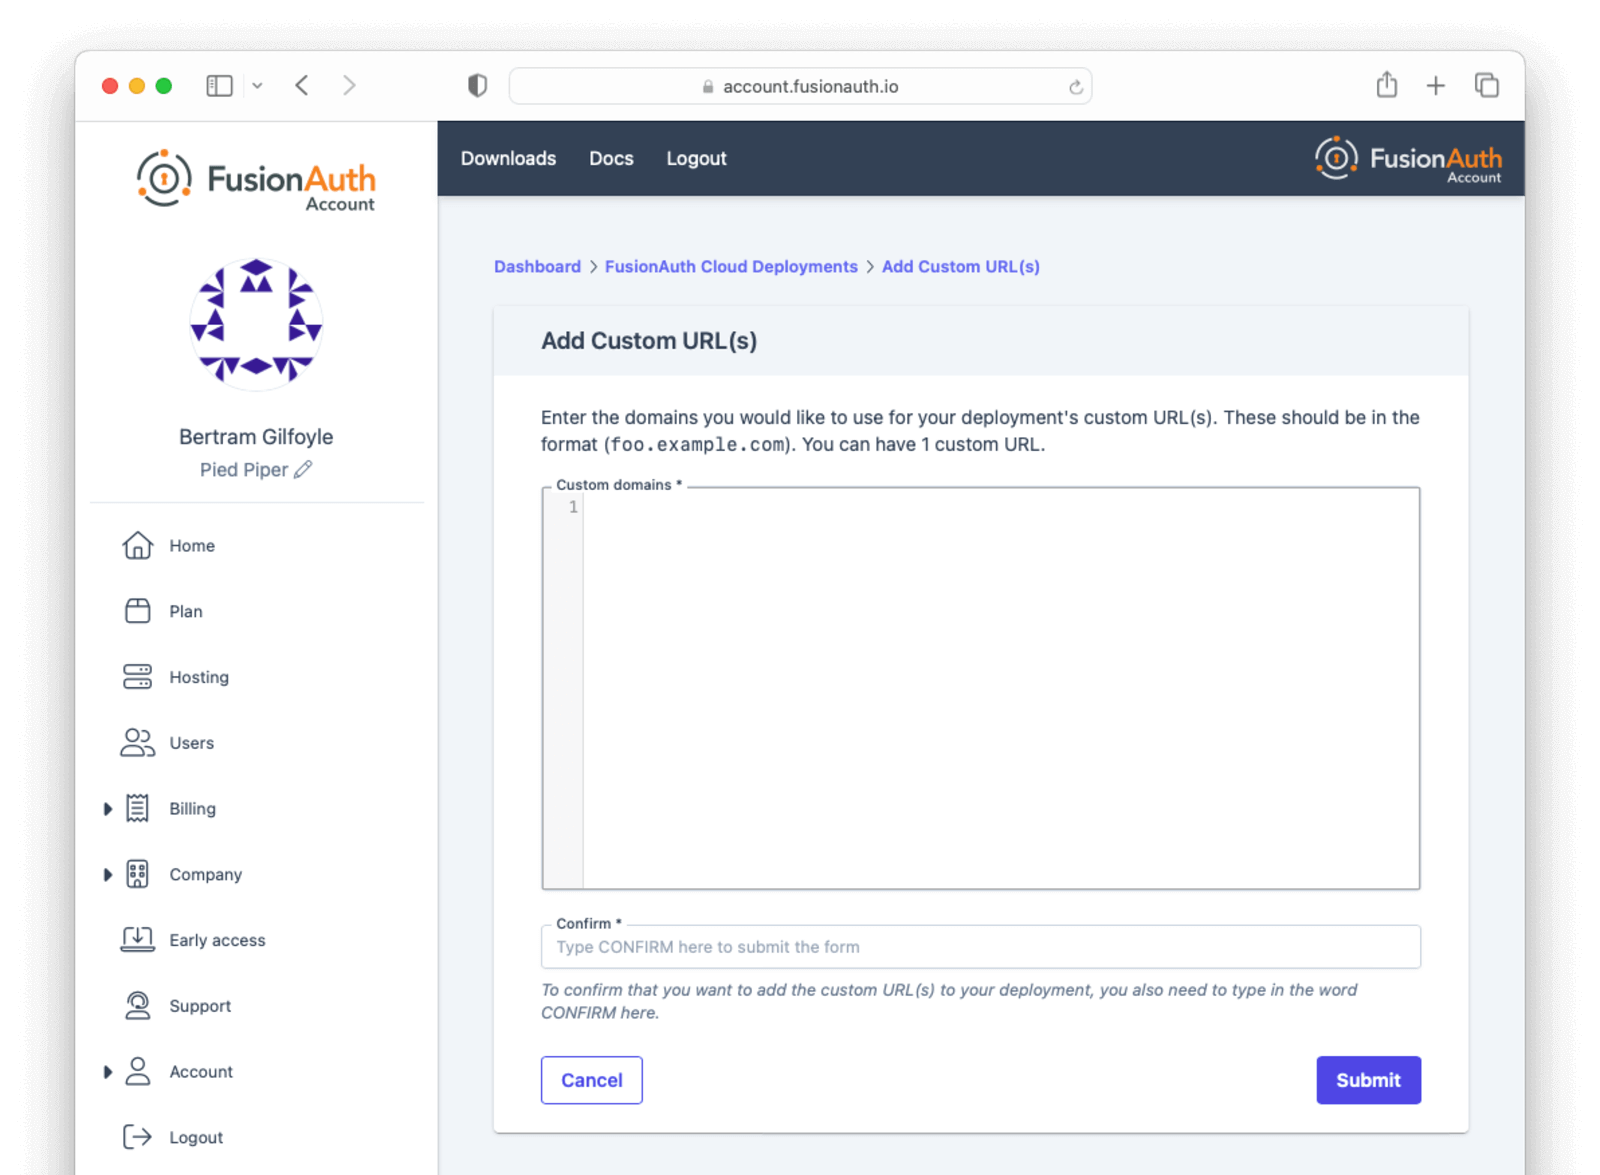
The Add Custom URL(s) page enables you to modify the entire list of custom domains simultaneously via a text box:
To migrate to the modern Custom URL(s) workflow, open a support ticket. This migration requires 30 to 60 minutes of downtime.
View Existing Custom Domains#
-
Log in to your account at account.fusionauth.io.
-
Navigate to the Hosting page.
-
Select Action -> Custom URL(s) for your deployment.
-
The Custom Domains page shows the DNS validation status of each custom domain, and search capabilities.
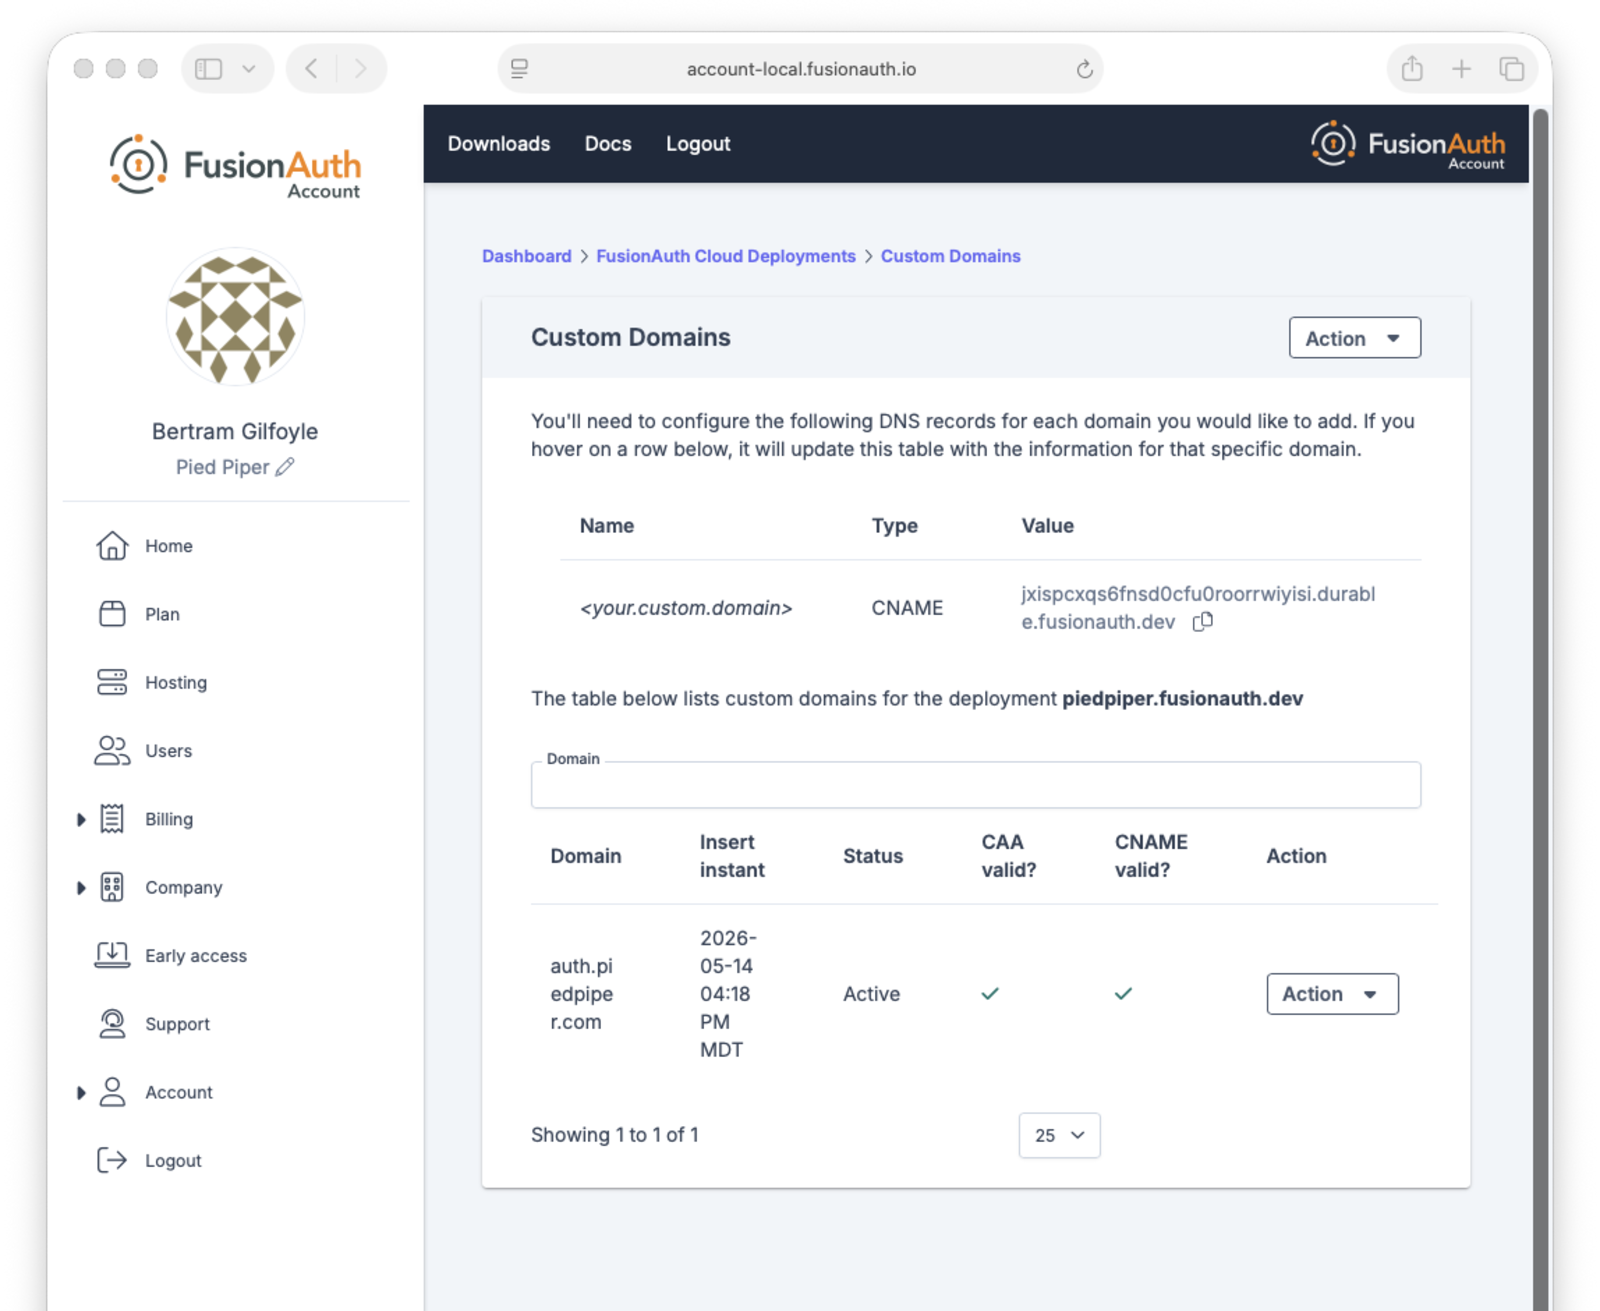
You can refresh the DNS validation status of a custom domain by selecting Action -> Refresh Status for the domain and clicking the Refresh button on the next page.
-
Log in to your account at account.fusionauth.io.
-
Navigate to Hosting .
-
Select Action -> Add Custom URL(s) for your deployment.
-
The Add Custom URL(s) page shows your current list of custom domains.
Add a Domain#
Before adding a custom domain, you must create a CNAME record targeting the durable URL for your deployment. Additionally, if your domain has a CAA record, it must allow the Amazon certificate authority to issue certificates for your domain by including at least one of the following domains:
amazon.comamazontrust.comawstrust.comamazonaws.com
The ability to add multiple domains is only available on High Availability (HA) deployments.
-
Log in to your account at account.fusionauth.io.
-
Navigate to the Hosting page.
-
Select Action -> Custom URL(s) for your deployment.
-
The Custom Domains page shows the DNS validation status of each custom domain, and search capabilities.
-
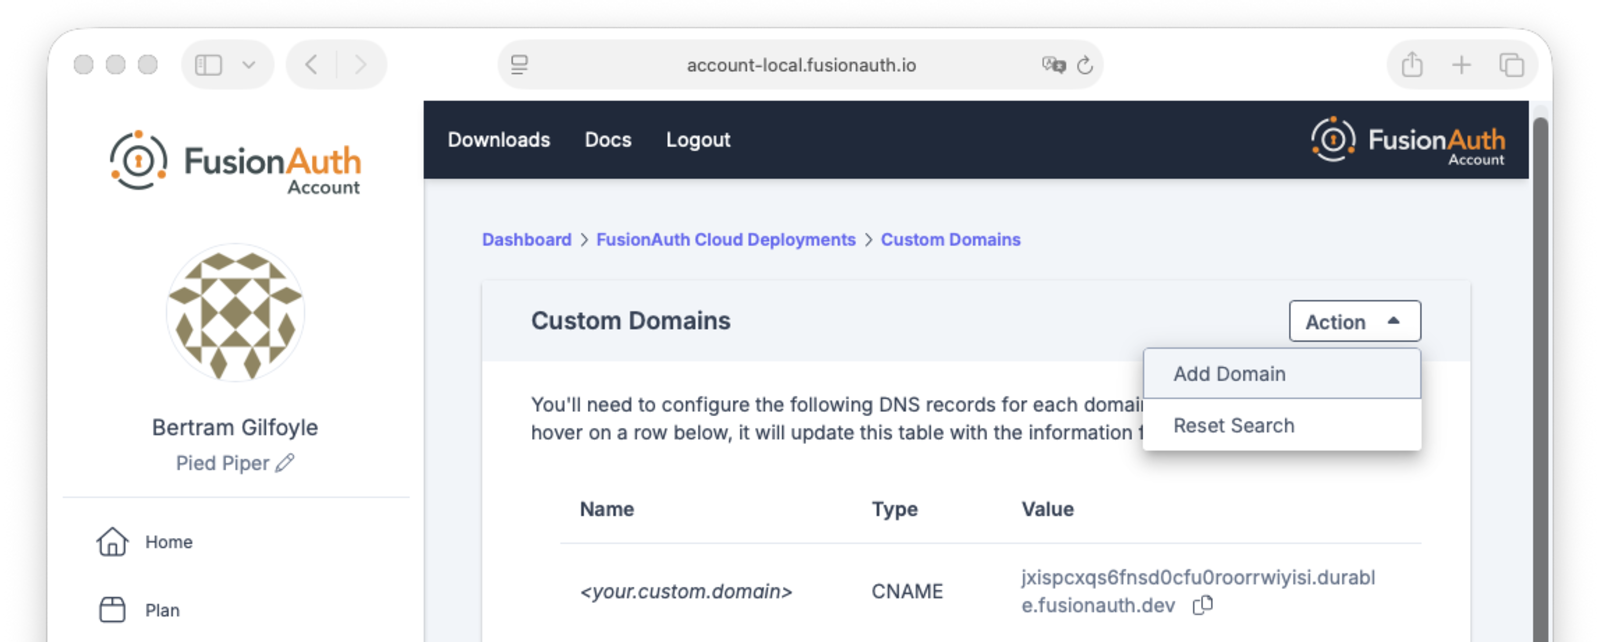
To add a custom domain to your deployment, click the Add Domain button in the Action menu at the top of the listing page.
-
Enter the new custom domain.
-
Submit the form.
-
You will be redirected back to the custom domain listing page, where you can see the provisioning state and DNS validation status for the new domain.
-
Since the DNS CNAME was created ahead of time, your new custom domain should already be validated and functional. If it has not yet been validated, select Action -> Refresh Status to re-validate the custom domain when DNS changes have propagated.
The Add Custom URL(s) workflow replaces the existing configuration. Any domains not included in the form will be deleted.
Adding the custom domain auth.piedpiper.com requires creating two records in your DNS provider:
-
A Validation Record CNAME - authorizes FusionAuth Cloud to use
auth.piedpiper.com:[random-value].auth.piedpiper.com. CNAME [random-value].acm-validations.aws. -
A Vanity URL CNAME - routes traffic from
https://auth.piedpiper.comto your FusionAuth deployment,https://piedpiperdeployment.fusionauth.io:auth.piedpiper.com CNAME piedpiperdeployment.fusionauth.io
- Log in to your account at account.fusionauth.io.
- Navigate to Hosting .
- Select Action -> Add Custom URL(s) for your deployment.
- The Add Custom URL(s) page shows your current list of custom domains.
- Add the domain names to Custom domains field; for example,
auth.piedpiper.com. Note that the contents of this field will replace all existing domains. - Confirm you want the change by entering the text
CONFIRMin the Confirm text field. - Click Submit .
- You'll be sent to a verification screen, which will update as FusionAuth Cloud creates your DNS records.
- Wait a few minutes. Once complete, you should see a set of records; you must add these records to your DNS.
- Once validated, the status will move to
Issued. No further action is required at this point.
A custom domain added in the account management portal will still work properly without refreshing the status as long as the DNS CNAME record exists. The validation indicators and status refresh are meant to provide additional feedback for configuring and troubleshooting a new custom domain.
Delete a Domain#
- Log into your account at account.fusionauth.io.
- If your deployment contains a custom domain that is no longer in use, you can remove it by selecting Delete in the Action menu for the domain.
- Confirm that the domain you want to delete is shown on the page, enter
DELETEin the form field to confirm the operation, and submit the form. - You will be redirected back to the custom domain listing page, which continues to display the deleted domain with the
Destroyingstatus while FusionAuth Cloud cleans up the supporting infrastructure.NoteThe deleted custom domain will continue to operate normally until the certificate for that domain expires. To prevent traffic for that custom domain being routed to your FusionAuth deployment, remove the DNS CNAME record that was created when adding the domain.
The Add Custom URL(s) workflow replaces the existing configuration. Any domains not included in the form will be deleted.
- Log in to your account at account.fusionauth.io.
- Navigate to Hosting .
- Select Action -> Add Custom URL(s) for your deployment.
- The Add Custom URL(s) page shows your current list of custom domains.
- Remove the domain name from the Custom domains field; for example,
auth.piedpiper.com. Note that the contents of this field will replace all existing domains. - Confirm you want the change by entering the text
CONFIRMin the Confirm text field. - Click Submit .
- You'll be sent to a verification screen, which will update as FusionAuth Cloud creates your DNS records.
- Wait a few minutes. Once complete, you should see a set of records; you must update your DNS with these records.
- Once validated, the status will move to
Issued. No further action is required at this point.
Durable FusionAuth CNAME#
If you have an existing custom domain, you might have an existing vanity URL with a CNAME similar to this:
auth.piedpiper.com CNAME piedpiper-deployment-prod.fusionauth.io
You may notice FusionAuth Cloud now supports a [uuid].durable.fusionauth.io CNAME where [uuid] is a UUID such as 3ffe6da1-e6f5-4be4-96e0-5dabdf42fd68. For instance:
auth.piedpiper.com CNAME [uuid].durable.fusionauth.io
This durable URL will not change and is functionally equivalent to the above vanity URL. Using this updated CNAME will enable use of Disaster Recovery services should you require them at a later point.
Unlimited Domains Transition (Enterprise High Availability Only)#
When unlimited domains are first enabled for a deployment, that deployment enters a transition state that lasts 30 to 60 minutes.
This allows time to perform any necessary DNS changes for existing custom domains to prevent domain resolution errors when completing the cutover to Unlimited Custom Domains. During this transition, other deployment actions such as upgrading or destroying the deployment are unavailable, but your deployment will continue to serve traffic normally.
You need to update existing custom domain DNS records pointing to the deployment's *.fusionauth.io domain name to refer to the Durable FusionAuth CNAME. Once you have updated the DNS records, you can complete the cutover to Unlimited Custom Domains from the account management portal by selecting Cutover Custom URL(s) from the Action menu at the top of the custom domains listing page and completing the form on the next page. If a deployment does not have any existing custom domains when unlimited domains are enabled, it can be cut over immediately.
Related
Learn how to create a FusionAuth Cloud account.
Learn how to delete your FusionAuth Cloud account.
Learn about the account portal, where you can manage account data, deployments, and licenses.
Learn about the pros and cons of FusionAuth Cloud compared to self-hosted FusionAuth.