Enable SSO Across Applications
On this page
Single sign-on (SSO) lets a user log in to one application and then open your other applications without entering credentials again. FusionAuth provides SSO through the SSO sessionThe session FusionAuth keeps in the browser after a user logs in through the hosted login pages. While the SSO session lasts, FusionAuth logs the user in to other Applications in the Tenant without asking for credentials. on the hosted login pagesThe login, registration, password recovery, and multi-factor authentication pages that FusionAuth serves. A Theme controls the look of the pages.. For how the SSO session relates to your application sessions, see How Sessions Work.
Prerequisites#
- Two or more applications that log users in with the Authorization Code grant and the hosted login pages. For the setup, see Add Login to Your App.
- All of the applications in the same TenantA logical container for Users, Applications, and settings that is isolated from other Tenants.. SSO doesn't span Tenants.
- A different host name for each application. Browsers share cookies across ports on the same host, so
localhost:3000andlocalhost:3001overwrite each other's session cookies. For local development, add names such asapp-a.localandapp-b.localto your hosts file, pointing to127.0.0.1.
Set Up SSO#
The first two steps change FusionAuth settings and your theme. The last step changes your application code:
-
Configure Each Application#
For each application, navigate to Applications -> Your Application -> OAuth and set the following fields:
- Authorized redirect URLs to the application's OAuth callback URL.
- Logout URL to a route in the application that ends the application session. FusionAuth loads this URL during logout. For more information, see Log Users Out.
SSO logs users in to Applications without a registrationWithout Require registration to complete OAuth authorization, SSO logs a user in to every Application in the Tenant. The access token for an unregistered user has no
applicationIdorrolesclaims, so check those claims in your application. To block unregistered users, turn on Require registration to complete OAuth authorization and register the users who need access. -
Create the SSO Session at Login#
FusionAuth creates the SSO session only when the user checks Keep me signed in on the login page. To create the SSO session for every login, replace the checkbox with a hidden field. In your theme, edit the OAuth authorize template and replace the
rememberDevicecheckbox with the following field:Create the SSO session at every login [@helpers.hidden name="rememberDevice" value="true"/]To create no SSO session at all, such as on a kiosk, set
valuetofalseinstead. Leave the checkbox in place when some users log in from shared computers. For how to edit theme templates, see Advanced Themes.To change how long an idle SSO session lasts, see Configure Session Lifetimes.
-
Redirect Users Without a Session to FusionAuth#
When a request reaches an application and the user has no application session, redirect the browser to the FusionAuth authorize endpoint, as for any login. When the SSO session exists, FusionAuth redirects straight back with an authorization code, and the user sees no login form.
Don't wait for the user to click a login link. An application that shows a login link instead of redirecting still works with SSO, but the user has to click the link before FusionAuth logs the user in.
Confirm the Result#
- Open application A in a private browser window. Log in with Keep me signed in checked, unless your theme sets the hidden field.
- Open application B in the same window. Application B logs you in without a login form.
- Log out of application A. Reload application B, and application B sends you to the login form.
When the last step leaves you logged in to application B, see Troubleshoot Sessions and Logout.
Link to Your Applications From One Page#
To give users one page that lists your applications, edit the Index template in your theme. FusionAuth shows the Index template at the root URL of your FusionAuth instance. Add a link to a protected page in each application:
<a href="https://app-a.example.com/account">App A</a>
<a href="https://app-b.example.com/account">App B</a>
Each link opens the application, which redirects to FusionAuth when the user has no application session. SSO then logs the user in. Link to the application, not to the FusionAuth authorize URL, so each application starts its own login with its own state and PKCE values. Avoid IdP-initiated login, where FusionAuth sends an unrequested login to the application. For a runnable version with two applications and a custom theme, see the dashboard example repository.
Require a Fresh Login for One Application#
SSO applies to every Application in the Tenant. To make one Application, such as an admin tool, ask for credentials even when the SSO session exists, add prompt=login to that application's authorize request. To ask for credentials only when the last login is older than a limit, add max_age with the limit in seconds, such as max_age=900. After the code exchange, check that the auth_time claim is recent. For more information, see OIDC Prompt.
To keep an Application out of SSO entirely, put the Application in a separate Tenant. Users then need a separate account in that Tenant.
For an extra factor before a sensitive action, rather than a full login, see Step-Up Authentication.
Create an SSO Session From an Access Token#
Available since1.56.0
When your application logs a user in outside the hosted login pages, such as with the Login API, the browser has no SSO session. FusionAuth can create the SSO session from a valid access token, so the user can then reach your other applications through SSO.
Turn on the Tenant setting once, then send each bootstrap request through a proxy:
-
Allow Access Token Bootstrap#
Navigate to Tenants -> Your Tenant -> OAuth and turn on Allow access token bootstrap to create SSO session. Click Save . With the API, set
tenant.ssoConfiguration.allowAccessTokenBootstraptotruewith the Tenants API.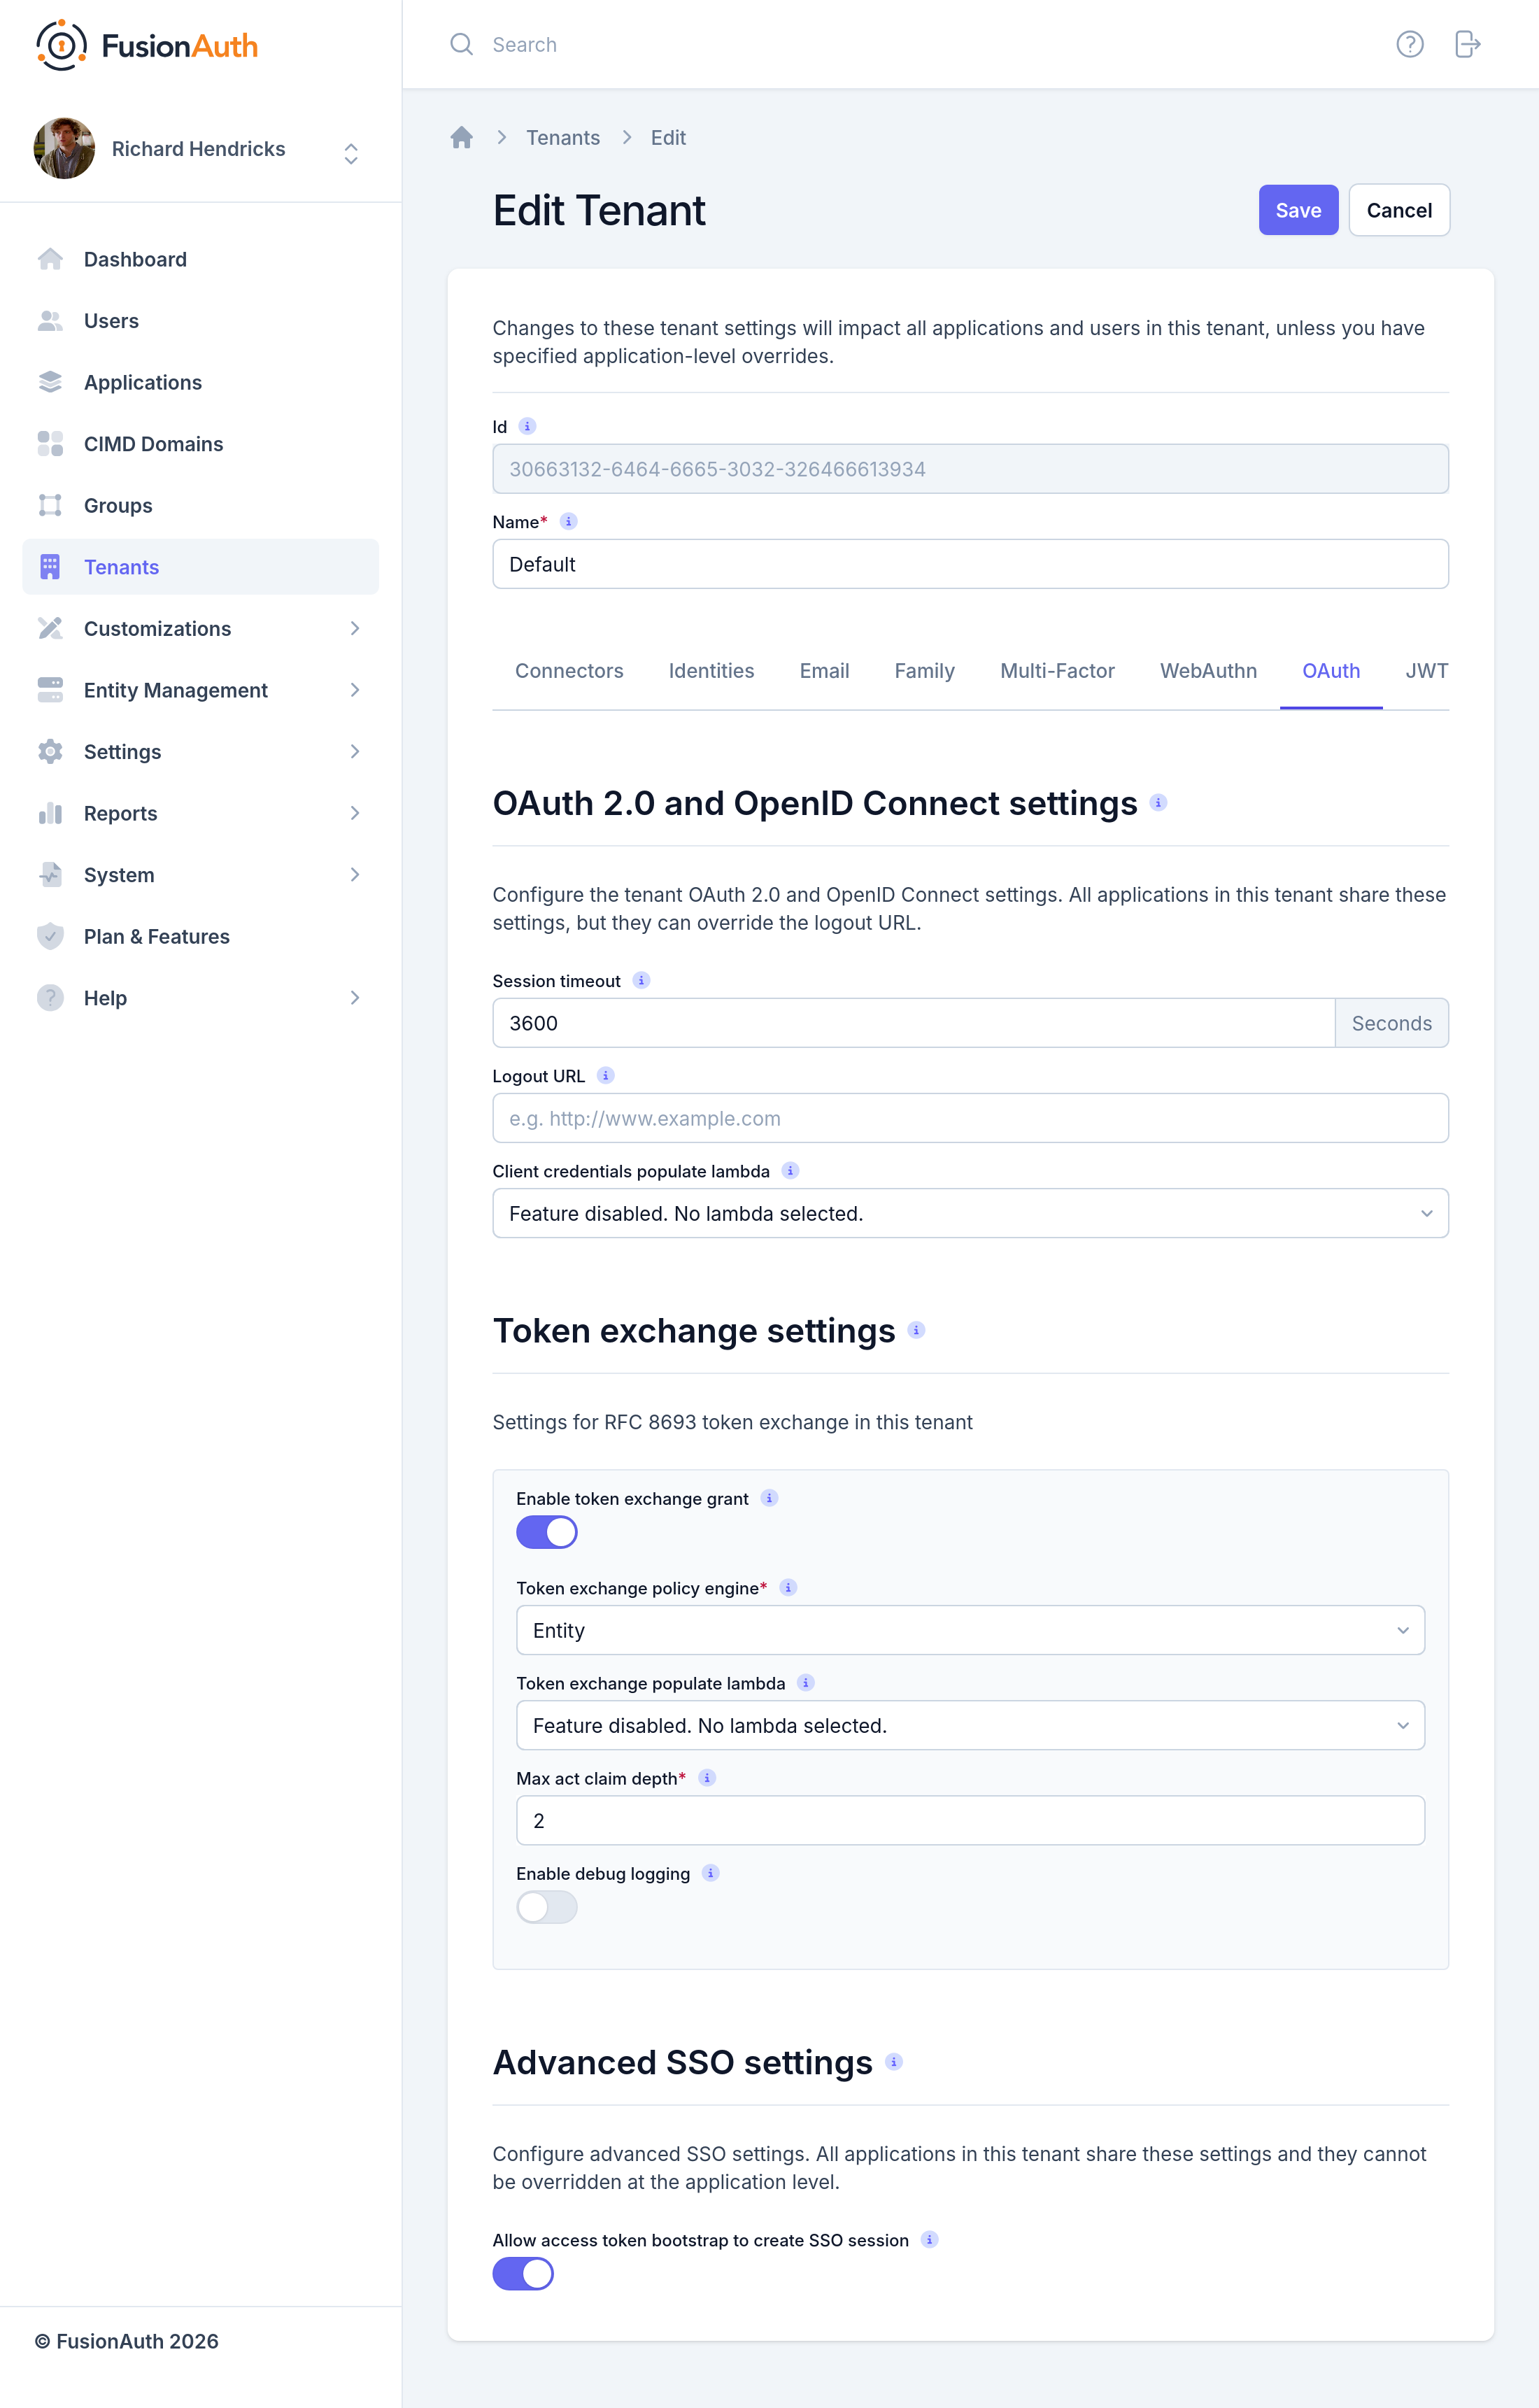
-
Send the Access Token to the Authorize Endpoint#
Send a normal
GETrequest to the Authorize endpoint, with the access token in anAuthorizationheader:Authorization header for an SSO bootstrap request Authorization: Bearer <access token>A browser can't add the header to a redirect, so put a reverse proxy in front of FusionAuth. For example, when your application keeps the access token in an HttpOnly cookieA cookie that the browser sends with requests but hides from JavaScript, so a cross-site scripting attack can't read the cookie., the proxy copies the cookie value into the
Authorizationheader on requests to/oauth2/authorize.FusionAuth accepts an access token that meets the following requirements:
- The token belongs to the same Tenant, and the
issclaim matches the Tenant issuer. - The token includes the
auth_timeclaim. FusionAuth addsauth_timeto every access token FusionAuth issues, so don't remove the claim in a JWT populate lambda. - The token isn't sender-constrained with DPoP.
When the token is valid, FusionAuth creates the SSO session and completes the authorize request with a redirect to the
redirect_uri. When the token is invalid, or belongs to a different user than an existing SSO session, FusionAuth ends the existing SSO session. - The token belongs to the same Tenant, and the
Related
Learn about the sessions that keep a user logged in to FusionAuth and to your applications, and how the sessions relate.
Let your users log in once and then transparently be logged into others.
Learn about how FusionAuth keeps users logged in across applications, and how to configure session lifetimes, single sign-on, and logout.
Learn how to let users log in to a third-party application, such as a SaaS product, with their FusionAuth accounts over OpenID Connect or SAML v2.